Woodworking Blog

This is the collection area of all of the writings I've made that pertain to woodworking in its various forms.

Workbench Undercarriage Glued and Pinned

  • Posted on: 8 March 2017
  • By: Jay Oyster

Webcam shot of the glued and pinned undercarriage of the bench, perched atop the benchtopI'm continuing to make progress on the Roubo workbench. After carving the message on the front board, I then glued it to the front edge of the benchtop. Then I set the top aside so I can drill holes for pegs on the bench legs and aprons. Just last night I finished pegging and glueing the legs together. Then I heft the top back up on my outfeed table, upside down. Then I got the undercarriage on top of it, so I can lay out the leg tenon locations on the bottom of the benchtop. I've got it roughly positioned now. I didn't take the time last night to grab a photo, so I'll just show how it looks right now on the webcam.

After I get the position of the mortises figured out, I'm also going to work on installing the Benchcrafted wagon vise. Progress is being made. I'm hoping to have this thing finished this month.

Carving the Credo

  • Posted on: 18 February 2017
  • By: Jay Oyster

Finished up tails on the endcapThe last update was getting too long, so I'll finish the rest of that here. After I finished fitting the dovetails of the front piece of the front to the endcap, I then worked on carving the credo I had long planned to grace the front edge of my bench. The main reason I left the front board off of the benchtop lamination was so that I'd have a separate piece to carve. It's also a lot easier to carve on a  piece resting on a benchtop than sitting on the floor attached to a 250 pound hard maple benchtop.

The entire message pattern attached to the front board. A pair of long lines along the length of the board allow me to slide the words back and forth slightly, maintaining a  continuous baseline.  The word kerning here can have a strong impact to a view on whether it's easy to read or not.Here, you can see how I've used a spray adhesive to attach the paper pattern to the front board. I'm actually showing some confidence here by making this mixed case. There's a reason why much of the gross carving of the ancient Roman monuments used all capital letters. Capital Roman letters have fewer curves, and curves are alway harder to cut so that they look consistenct. (Think of the letter E and T.) Still, I've carved several signs in the last couple of years, so I decided I liked the more classically elegant look of lower case serif lettering .  .  . and I had just enough confidence to try.

The letters are about an inch and a half tall. One thing that's important about laying out your message is to size your lettering to fit your carving gouges and chisels. At this size, I could use my 6 and 10mm wide chisels, but 12 and 20 were way too wide. This somewhat limited my choices in gouges since I mostly have only one width in each curve size. In carving chisels, a number 1 is a flat chisel. Each higher number indicates a tigher curve, all the way up to a number 12 which creates a very tight curve of diameter of approximately a quarter inch. This curve numbering is known as "sweep".  Actually, No. 11 and No. 12 are usually not circular, but rather more U shapped, with the sharpest curve at the bottom of the arc. 

Carving my credo on the front board of the benchtop, to be attached next

Project Ideas in the New Home

  • Posted on: 12 February 2017
  • By: Jay Oyster

We've been in our new house for about eight months now. Frankly, after moving four times in five years, I was just too worn out to consider new woodworking projects. But I've caught my breath.

I'm heading toward the finish line on the Roubo workbench, and I owe a completed jewelry cabinet to my wife. But along with those, I'm starting to think. Things to tackle. New wood challenges to try. 

I've taken to listening to the WoodTalk PodCast. (I was also briefly listening to The Woodworking Podcast, but their verbal tics finally just got on my nerves enought that I had to give them a break. "I made it to where . . . ", ) The WoodTalk podcast is nice. It's funny. It inspires me to try things that are new and challenging. Shannon is a naturally entertaining presenter, and the new Matt is nicely "aw-shucksy" authentic and enthusiastic. Mark is there. If he can be a little less cynical and snarky, I'd like it more, but I'm still impressed by anyone who can take this hobby and make a business out of it.

Multi-level play fort idea for our backyard. The shed already exists in our yard. I'm using it for scale.
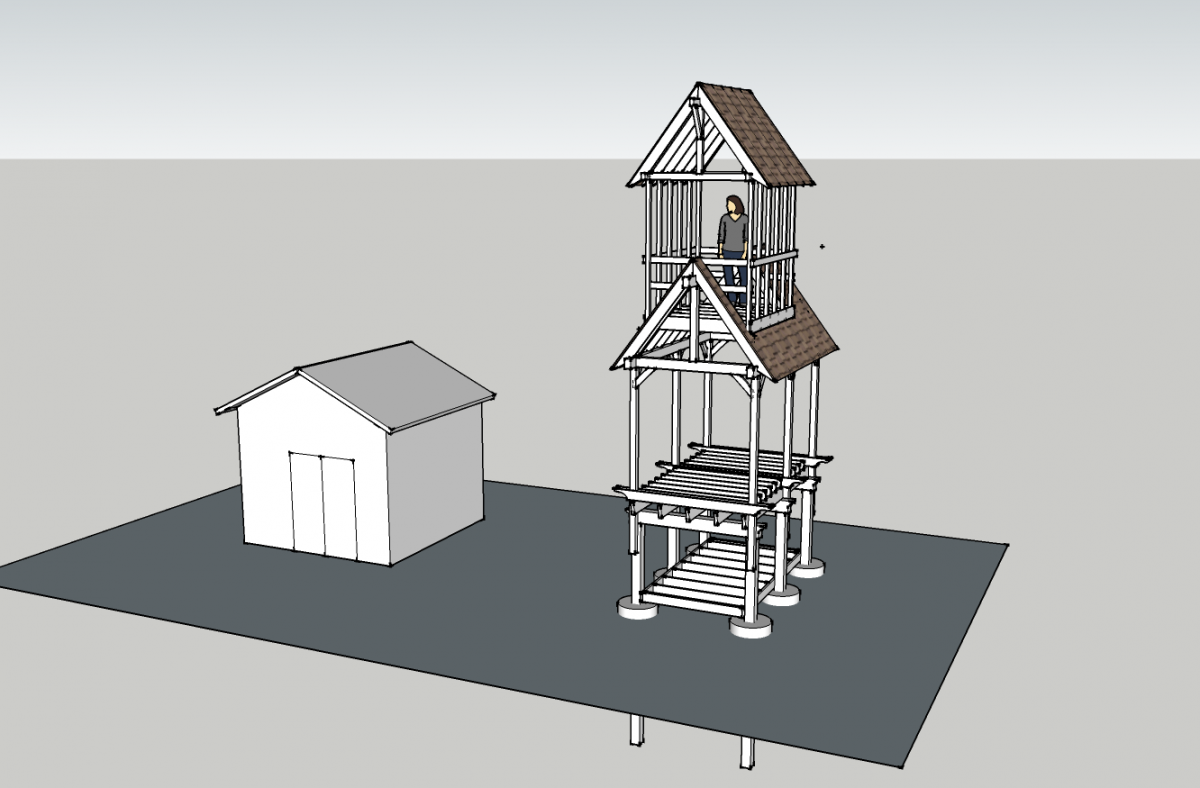
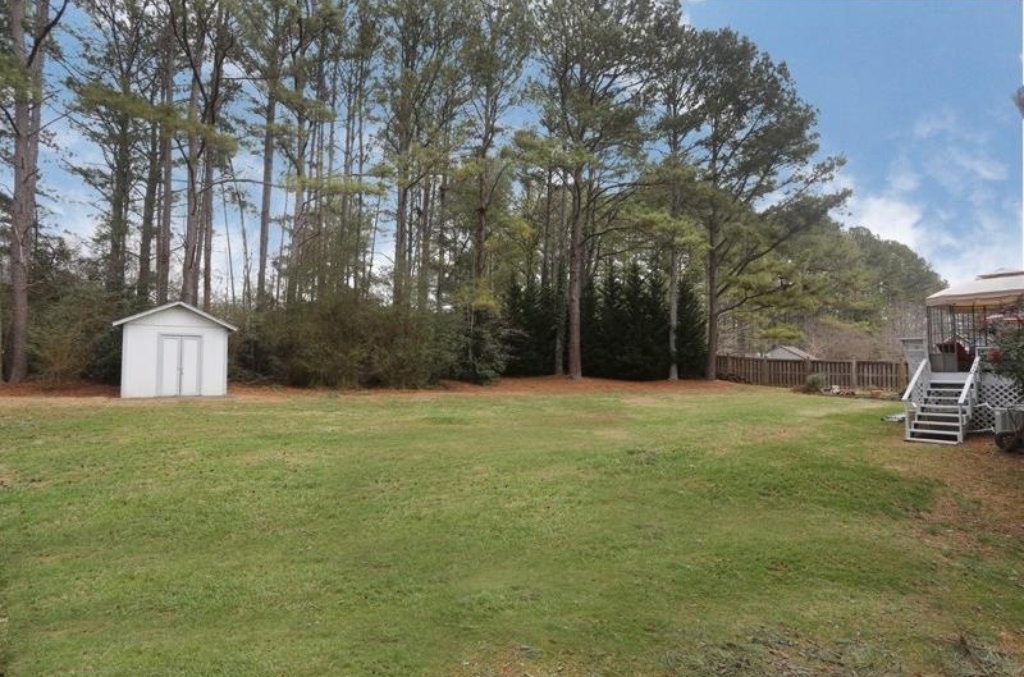
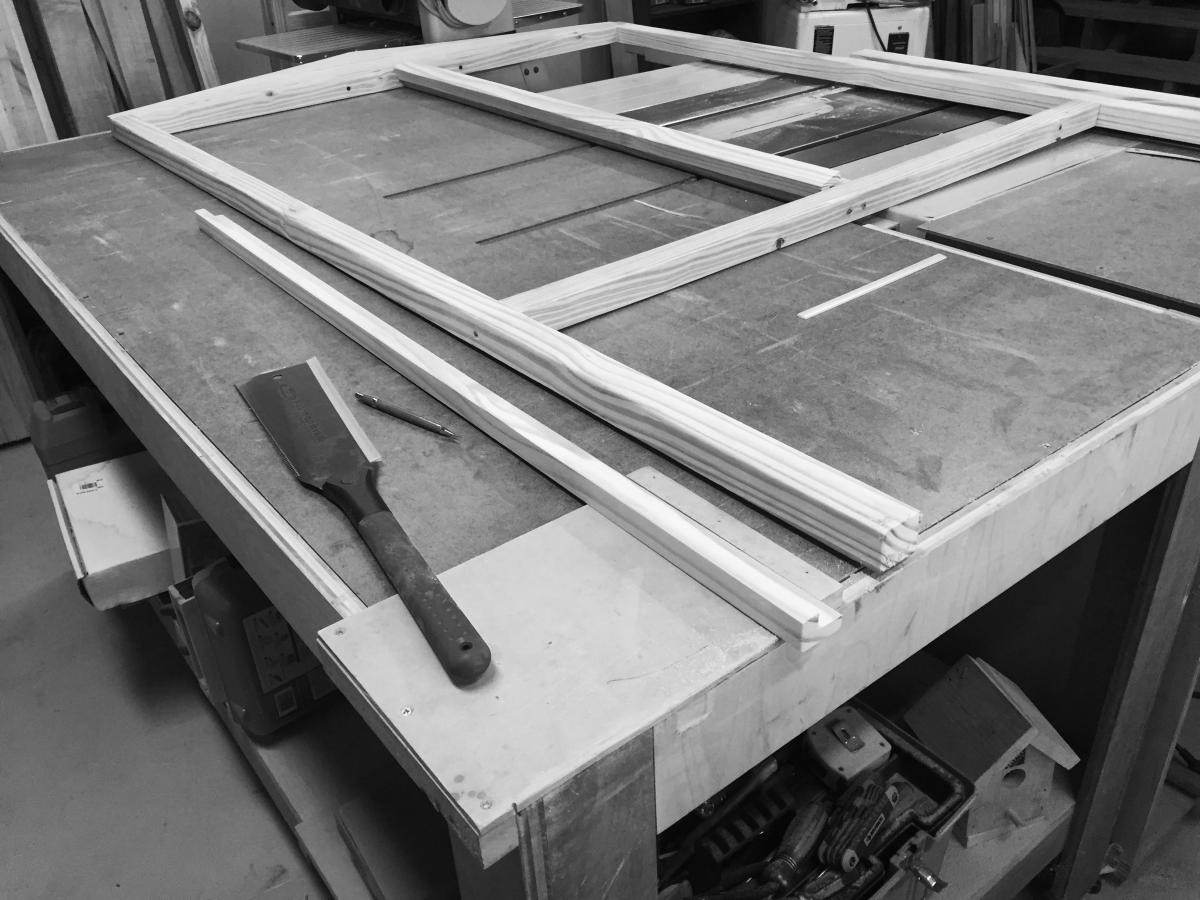
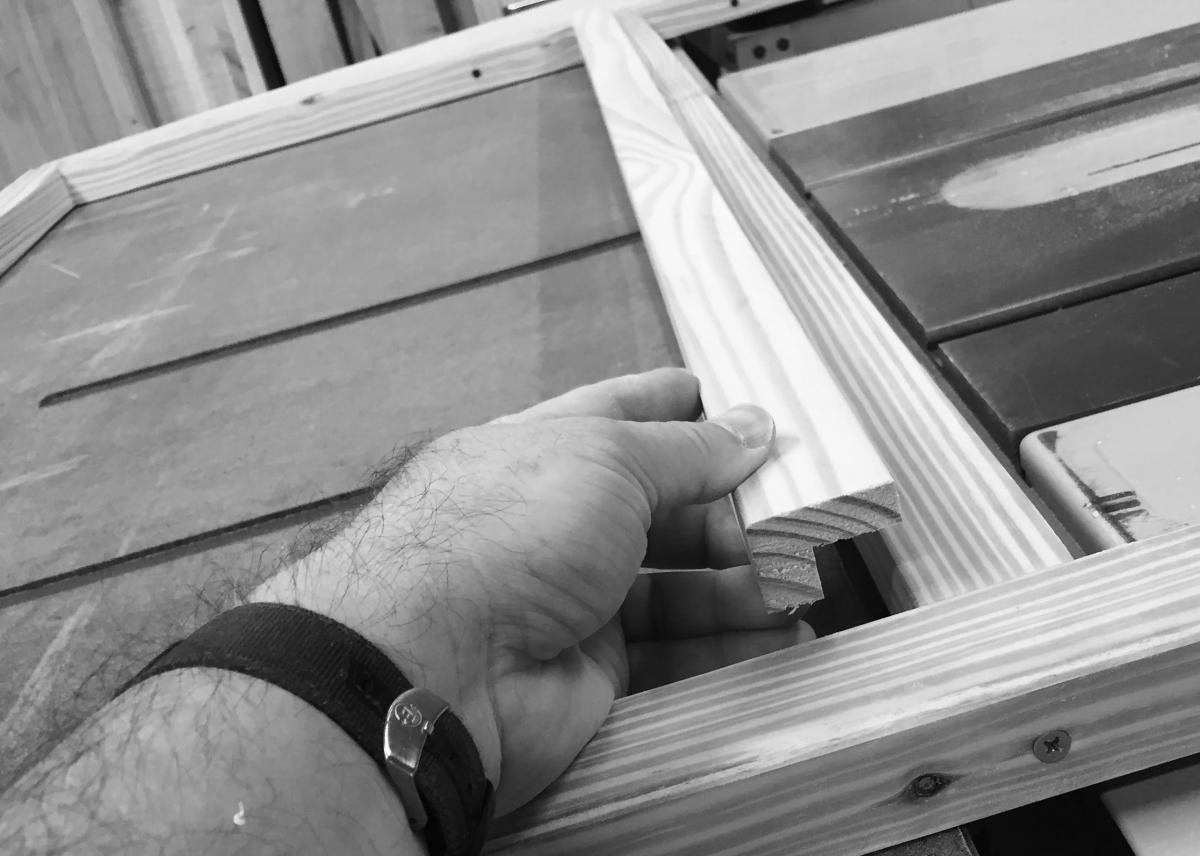
So . . . two project ideas. One is a playset I've promised my boys. If you look back in history on this site, you'll see that I built a really big playset for my first son at our home in Florida. But then we lost that place, and I've told my younger son ever since that I would work to replace it. They're really getting too old now for a 'playset', but they both would love a backyard fort. So that's what I'm going for. I have two types of projects . . . the kind I conceive of and take forever to build (see Roubo, jewelry cabinet), and the kind I think of in a weekend and build in a month (see the aviary, and the hanging tool cabinet). I have to make this backyard fort into the latter. Still, I want it to be something special. I've been thinking more and more about post and beam construction, so I'm going to use home center materials, and the tools I've mostly got already, to build a multi-story fort. 
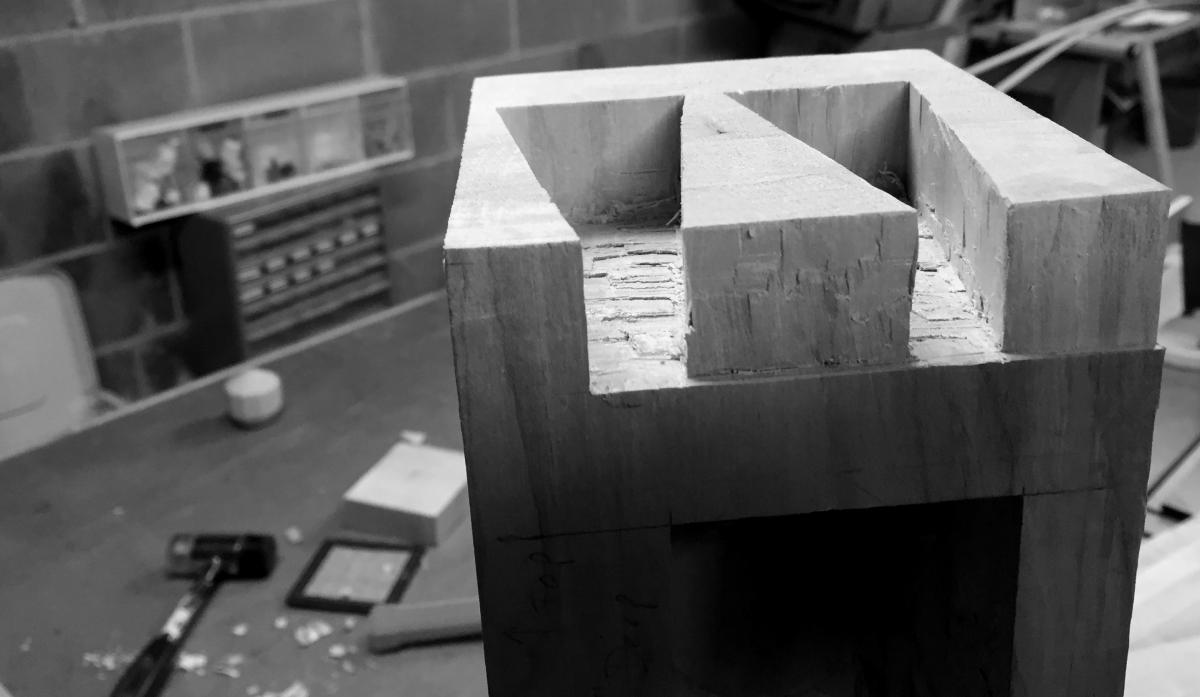
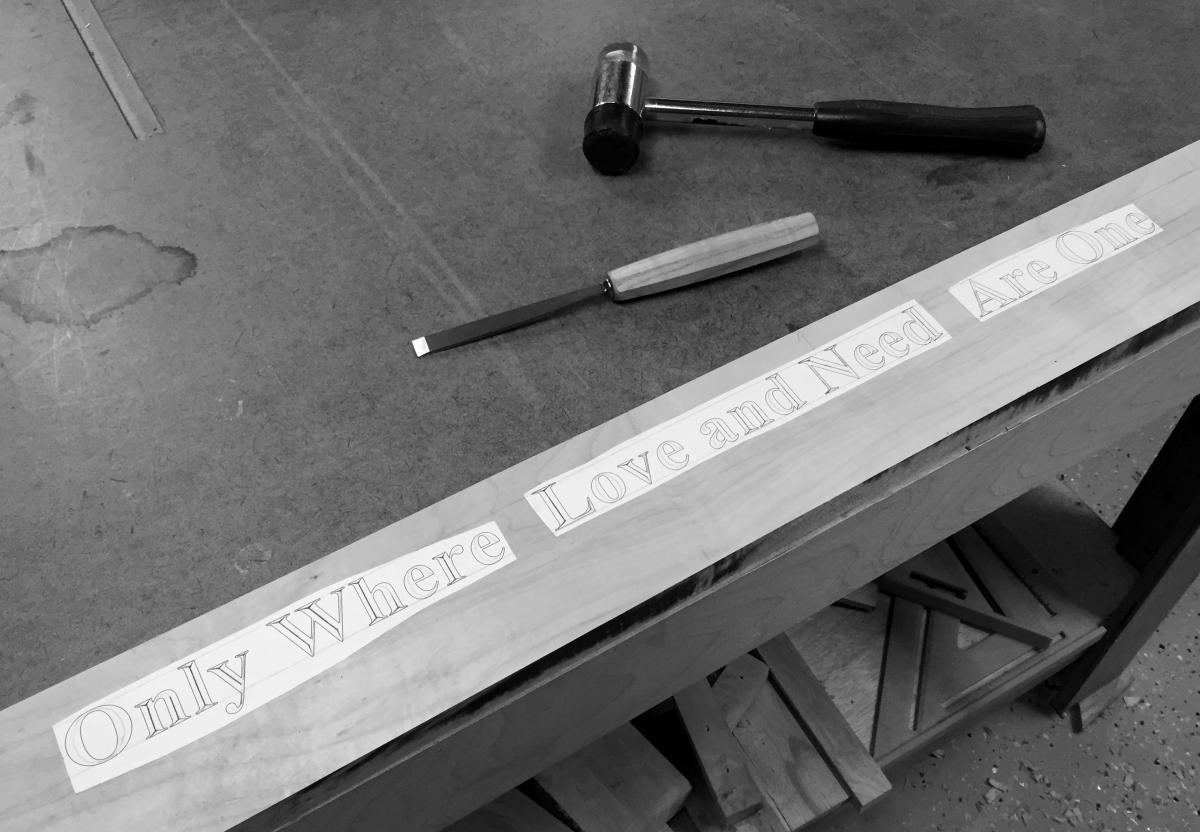
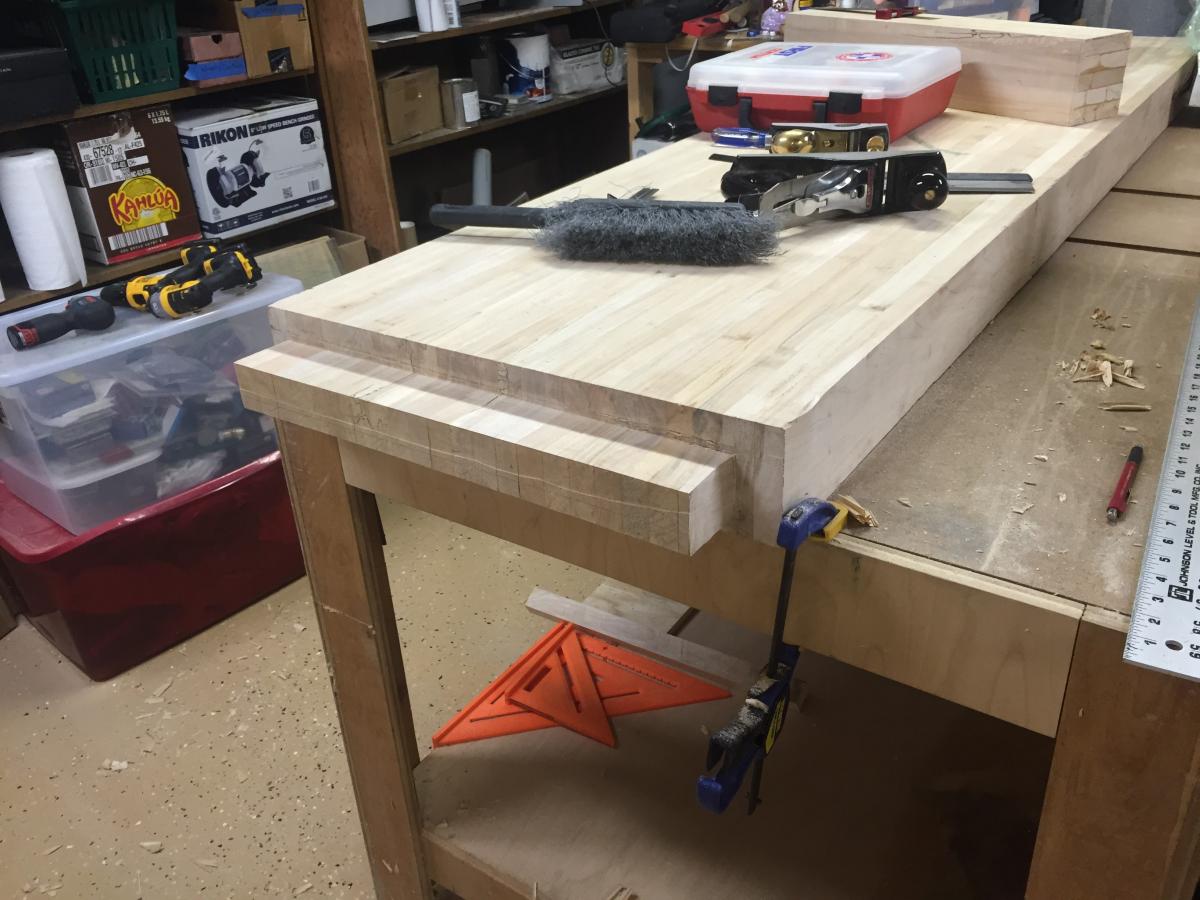
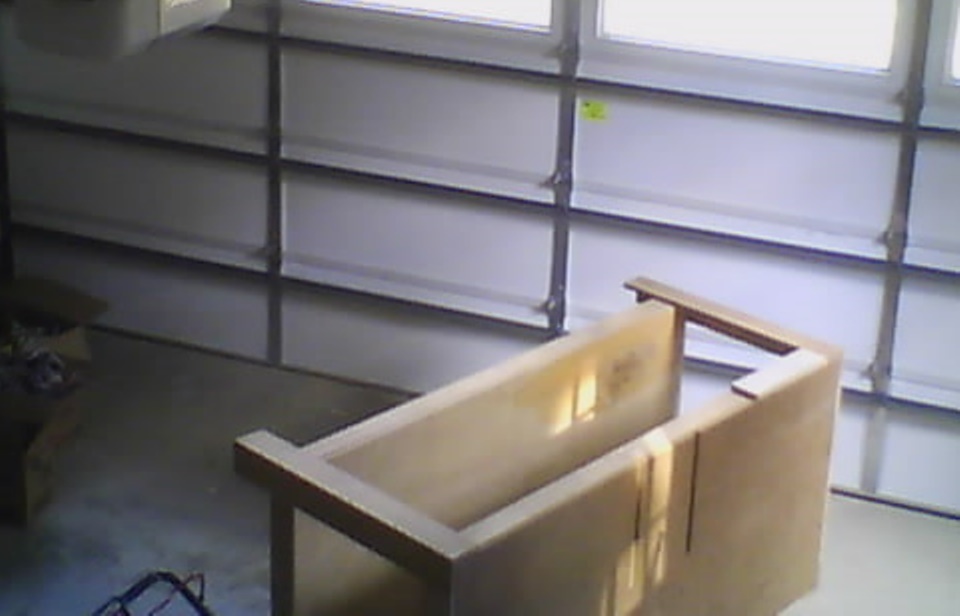
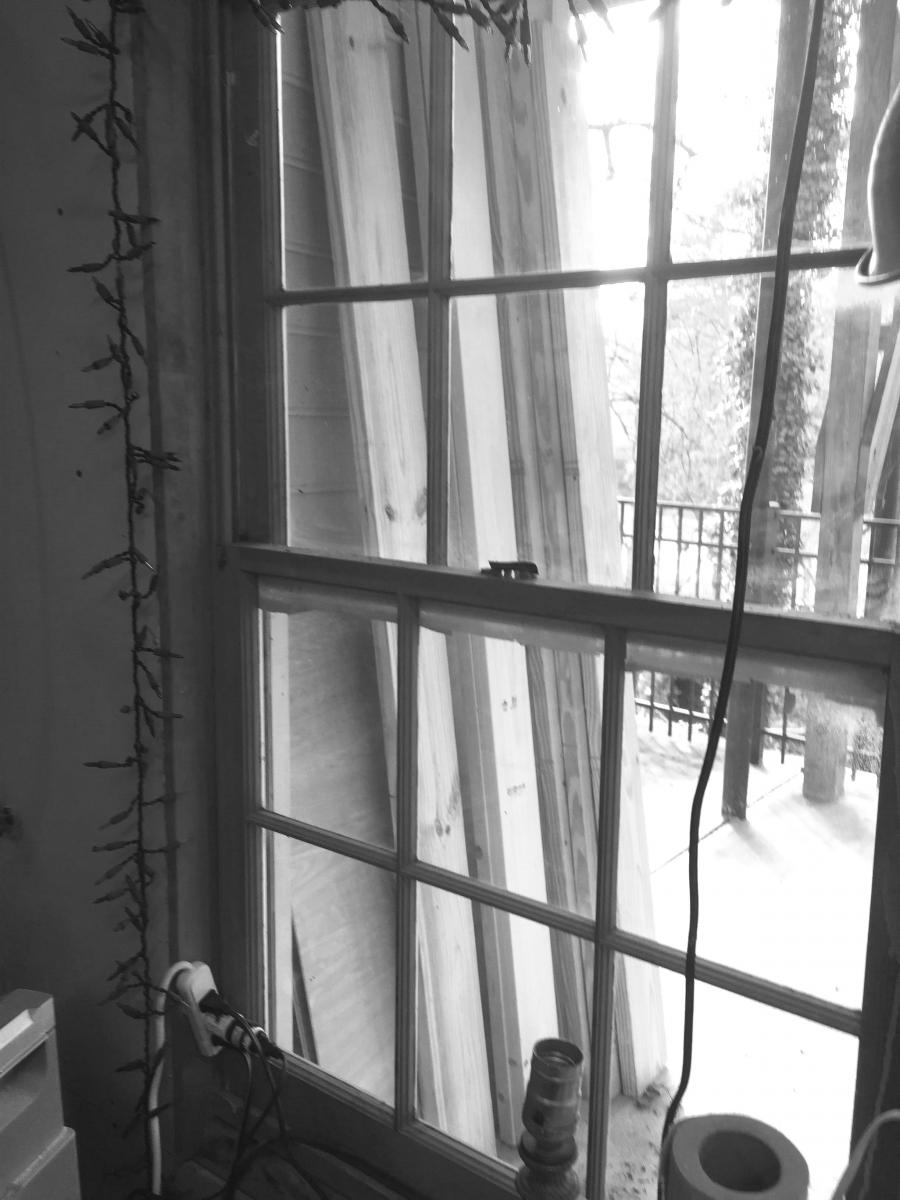
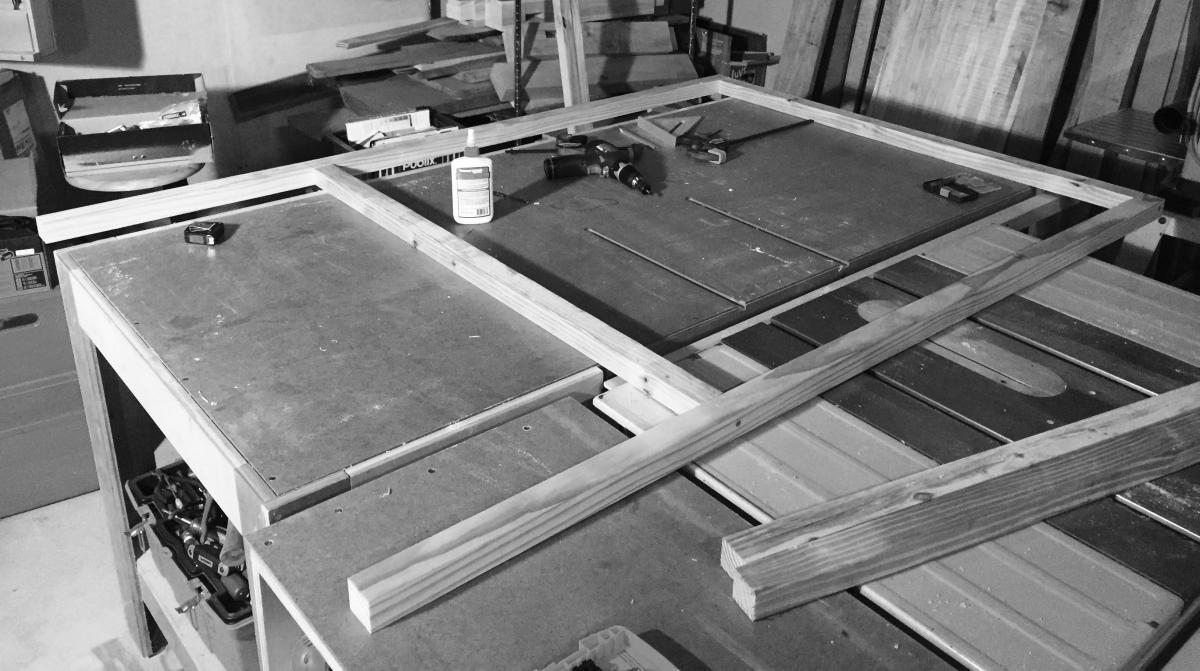
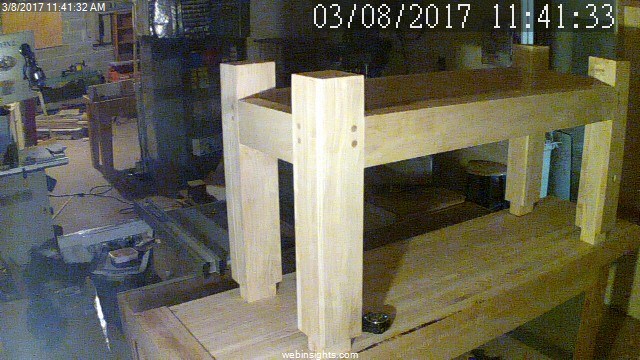
Steady Progress on the Silver Maple Roubo

  • Posted on: 12 February 2017
  • By: Jay Oyster

Benchtop endcap with the mortise to be cut laid out in pencilIt's not that I'm not doing anything. I haven't been posting to the site due to too much work at my day job. I've been slowly and steadily making progress on a couple of projects. Mostly I've been working on the Roubo workbench. Six years and counting on this project.

So where were we when last I left the narrative? I did the mortises for the leg stretchers. I've been working on getting the top ready to  attach to the base. So this meant:

  • Attaching the end cap
  • Fitting the front leg vice to the leg
  • Cutting the front part of the benchtop to dimension, and then dovetailing it into the endcap
  • Carving my credo into the bench front

I still need to do two more things before I can attach the legs to the top. I need to cut the mortises for the leg tenons into the top itself. And I need to install the Benchcrafted wagon vice onto the bottom of the benchtop.


Cutting the pins on the endcap and the tails on the bench frontispiece

Endcap work on the Roubo

  • Posted on: 7 November 2016
  • By: Jay Oyster

Cutting the workbench endcap tenonGetting the shop up and running again has been a bit of a slog. Even getting the table-saw outfeed table into my shop turned out to be a major undertaking. Still, I've gotten the basic shop together, and started work on the workbench again. I didn't take many pictures beyond what I'm showing here, but I am making progress again. I managed to get about 3 hours of shop time this weekend. The first in a very long time.

I cut the tenon for the endcap, so I can start working on the wagon vise. Doing this cut with the circular saw turned out to present some challenges. The straight edge I clamped on the end on which to run the saw to cut the cheeks, slipped . . . on both faces. So Instead of a rectangular tenon, it turned out to be more of a parallelogram. I had to fix that with hand planes and hand saws, and ended up with a tenon that is a bit thinner than expected. Still, the fine work was satisfying, and I got back in touch with my hand tool mojo. Still need to drill out the end cap mortise and figure out the layout of the wagon vise. 

Cutting the tenon on my newly liberated outfeed table

Reclaiming a Woodworking Space

  • Posted on: 30 October 2016
  • By: Jay Oyster

Before getting it into the shop, the outfeed table prepped for leg surgerySince I posted about possibly getting back in the shop, a great deal has happened around our homestead. Getting the shop ready to cut wood again is about 8 deep in the to-do list layer. Just a couple of things we had to do around our house.

  • Cleared a fenceline around the back of our property. See the next two points. For this, I just HAD to buy a handy-dandy 40VMax DeWalt Chain saw. Nifty as hell. I'll see about posting a tool review soon.
  • Install a fence around the entire back yard (see the next point for the reason why this HAD to happen now)
  • Get a long-promised puppy for the boys
  • Get the major leak fixed on the first floor bathroom sink (leaking into the workshop below)
  • Get the major leak fixed on the second floor bathtub (leaking into the workshop below)
  • Get the dehumidifier installed (see the above two points, and note that my underground shop has cinderblock walls)
  • Figure out how to run a drain pipe from the dehumidifier so I don't have to empty 3 gallons of water from it three times a day
  • Install a new garage door opener in the garage

That's all stuff that isn't strictly woodworking related, although you can probably see that several of them had largely detrimental effects on woodworking if I hadn't gotten them taken care of.  Actually, to be brutally honest, if MY WIFE hadn't managed to take care of them by hiring people to handle it.

Still, I have managed a few things around the shop to get myself setup . . . at last.

Incredibly Busy Summer - Breathing Room and Actual Shop Time Starting

  • Posted on: 20 September 2016
  • By: Jay Oyster

Well, we moved.

I haven't updated this site since July, because frankly, I haven't done a lick of work in, or more appropriately ON, my shop. It needs a bunch of work. I'm just now starting to have the breathing room to do something in the shop, and also to update my website. So I'm back. Hi! How've ya been?

West end of the new basement shop spaceYeah, so we moved into our new house in early June. I have to admit that this isn't my ideal woodworking arrangement. But we didn't buy the house for that. There were lots of pros and cons to consider. This house is our new home because 1) It has a great yard for the kids to play in and for us to put in a garden and me to build a new giant playset for the boys. Because it has a great kitchen we love. Because it feels like a home and not just a nice house. The neighborhood is nice, quiet, and not one of those engineered micro-landscaped developments that seem to be everywhere around large cities these days, but instead feels like an old fashioned neighborhood. The schools have turned out to be great! And oh, by the way, it has an adequate space that I can use for my woodshop.

The shop itself is the north half of the basement; a long thin room about 35 feet long and about 12 feet wide. I get to share it with the furnace and a spare fridge we inherited from the previous owners. Plus a couple giant shelves along the West wall. I'm not complaining about the shelves. Mostly I just dumped all of my tools into the room and left it there until now. My wood collection largely went into the shed in the back yard, a 10' x 10' room now completely stuffed with my wood and two tables . . .one of which is my table saw outfeed table (another story.)

Review: 'Making Shoji' by Toshio Odate

  • Posted on: 29 April 2016
  • By: Jay Oyster

Cover of my copy of Making Shoji by Toshio OdateBook review -- 'Making Shoji' by Toshio Odate.  Reviewed on 4/29/2016.

Recently, I've been thinking of ways to make my woodworking more . . . oh, I don't know, soulful, I guess. I do this hobby not so much to complete projects (based on my pace, that much should be right obvious) but to enjoy a sort of zen mindfulness. But I also do want to accomplish something. It's a personality flaw of mine that I can concentrate on something so intently that I slow to a crawl and don't make any progress. Woodworking with no progress isn't woodworking, it's meditation. (Or more likely in my case, ennui and then sleep.) But one of the ways I've been hoping to increase the mindfulness of my woodworking was to take on something elegant, simple and beautiful. I've always wanted to try to build a Japanese screen. Not one of those Western, free standing ones you saw in 1930's movies where the movie star goes behind it to change suggestively into 'something a little more comfortable', but rather those structural elements from Japanese homes. Shoji, as they're called in Japan, form an ultra material-efficient way to form rooms in a private home. And I'd like to make some, hopefully in a way that is less cultural appropriation and more a way to honor the masters.
 
With that desire in mind, I went on Amazon and ordered a book. I'd heard the name of Toshio Odate in recent years. He's known in the U.S. as a teacher and ambassador of Japanese woodworking into North American culture. The Amazon showed me that he had written a book on just this subject. I almost squeee'd with glee. I ordered it in about 14 nanoseconds and with the Prime account, had it on my doorstep in 23 and one half hours.

Prepping to Move

  • Posted on: 29 April 2016
  • By: Jay Oyster
In my current shop, it took almost 18 months after we moved in before I could really be productive. Between unpacking, and those things that you need on a project but just can't find in among the packing boxes, it just took awhile for things to settle down. (I *still* haven't located my RAS. It's a really nice Bosch unit and I miss that thing. No idea where it went.) So, I've been getting real work done in my shop for the last 6 months or so, so of course it is now time to move again. Naturally. Our lease is up in late June, so one-way-or-another, we are outta here!
 
In the personal negotiations beteen my wife and I over what features we want in our new home, I finally settled on only two requirements. And even those proved to be contentious. I wanted a place where I could set up my shop, preferably with an area of around 500 ft² in an unfinished basement or garage, and I wanted at least a half acre of fairly flat property. The space for the shop wasn't the problem, the land was. Finding a fairly flat lot in this part of Georgia is always rather difficult, we live in a hilly region and one full of trees. Mostly that's nice. But finding a half acre or larger (flat) lot in our price range was a bit of a challenge. When looking for potential candidate homes to buy in our target area, it took the list down from several hundred to less than 6 or 7 properties at any given time, and those seem to pop on and off the market at light speed.
 
A nice, flat backyard for our potential new homeBut, I think we may have found what we were looking for. I see now that during the walk-through and inspection visits to the new house, I neglected to take any decent shots of the potential new workshop area. However I do have a good shot of the great back yard. Look, I'll even get a nice shed! 

Finished door hardware, Primed the Roof

  • Posted on: 6 April 2016
  • By: Jay Oyster

Installed knobs and latch hardware on the small side doorsGot a bit more done on the aviary tonight. I bought the basic door hardware from the big box hardware store last weekend and finished installing it today. The hinges I had on already, but I've now installed the door latches, the door handles, and the knobs on the little doors. These knobs were actually in a box in the house we had in Florida. That home had been built by the builder of the development, and I found a box of about a hundred white ceramic knobs and mounting screws. I've used the heck out of those knobs over the years. I've only got a few left. Here I mounted two on the little side doors of Adriana's aviary. 

I love it when a plan comes together. Smooth moving doors all around.

Added Grids, Lights

  • Posted on: 3 April 2016
  • By: Jay Oyster

Opening the roll of PVC-coated wire fencing to start fitting it to the aviary partsI spent about 12 hours this weekend working on the aviary. I finished attaching the doors and door handles over the past week, so now it was time to add the grid or cage material and to finish up some interior work before adding the roof. I mentioned in a previous post that I had ordered the grid from a New Jersey fencing company. It's nice stuff, but it wasn't cheap. Well, it was actually not that bad, per unit area, but I ended up ordering much more than I needed just for this project. I wanted 24" wide pieces, so they'd fit naturally on the 24" wide sides and easily cover the bottom and doors. The label from the Academy Fencing spoolThey didn't have the 24" x 50' spool in stock, so I ordered a 24" x 100' spool. That was $90. But that thing was HEAVY, probably close to 60 pounds. Thanks to that, shipping was another $45. I ended up spending as much for the fencing as I did for everything else on this project. I was a bit surprised by the label. It seems they manufacture the stuff, or at least they repackage it themselves. 

Cutting the wire grid with a Dremel tool fitted with a cutting diskAfter opening up the spool, i had to figure out how to cut the stuff. I tried tin snips, which did work, but it was slow and it would probably have a) ruined my tin snips, and b) killed my hand by the end of it. So I went and hunted down my trusty Dremel tool and cutting disks. Luckily, I found them in my wife's stained glass supplies. (She steals my tools from time-to-time to finish up her glass projects.) The Dremel worked well, but had to be careful to wear safety glasses and be careful as I cut each wire. Cutting through the PVC coating and then through the wire usually resulted in a little "CHICKt" at the end of the cut, just as the disk exited the back side of the wire. This was the disk catching on the edges of the wires. I went through about 20 cutting disks, each one rather startling me as it exploded off the end of the Dremel. A couple of times I heard the pieces hit the ceiling or the far wall of the shop. Oh, and the smell of the PVC as I burned through it with the cutting wheel . . . not pleasant.

Aviary with doors, grids, and lights installed

Doors and sidewall gap filler

  • Posted on: 29 March 2016
  • By: Jay Oyster

All of the door parts dimensioned and organizedAnother weekend, another update. I'm getting into a rhythm here.

This weekend's goal was to build the front and side doors. Unlike the main structure, which is out of southern yellow pine (SYP), I'm building the doors out of whitewood, which is significantly lighter. I don't want the doors to sag. 

Crosscut sled set up to cut half-lap joints on the door frame partsI ripped an 8' 2x6 down into 1" by 1 ½" strips on the table saw, then cut them to length on the chopsaw. The plan is to half-lap the corners for strength. The doors should be light enough, even with the cage material attached, to stay square. I set up the crosscut sled on the table saw to cut the half-laps. This took some dialing-in. I set it up for less than half the depth and then inched up on the correct fit. I didn't bother installing the dado stack, I just nibbled away with multiple cuts. (AKA, 'The I'm too lazy to set it up' method, or better known as the Norm Abrams method.) Here, you can see that the depth is *not quite* deep enough. Another half-turn on the blade height knob and it was perfect. I also tweaked the location of the stop block a touch to make the overlap perfectly square.

First fitting of the half lap joints on the lower side door. Still a little shallow. I'll need to raise the blade just a touch.AHalf-lapped joint on the corner of the lower side door. Still dialing in the length of the tenon at this point.fter cutting the joints, I then went back and touched them up with a sharp bench chisel to remove any loose cruft between adjacent 'nibbles'. This also smoothed the cheeks of the inside joint enough that the glue joint should be strong. I glued up all of the doors and allowed them to dry for about three hours.

I'm using the quick clamps for everything these days, since most of my nicer clamps are all still packed away in a box somewhere. The sad part about that is that I built a really nice wall-mounted clamp rack for all of my clamps back in Florida, but I just don't have the wall space in this shop to put it up. (Not that I want to drill any more holes in the rented walls in any case.)

Progress has been made. Started mounting the doors.

Door jambs, Test assembly, Stain

  • Posted on: 21 March 2016
  • By: Jay Oyster

Front wall frame laid out in prepartion to fit a door jamb. I cut the L-shaped jamb pieces on the table saw, then cut them to fit with the ryoba.I worked on the aviary some more this weekend. Building a piece of furniture is always an exercise in mental gymnastics, as you figure out the sequence of how things must be assembled and finished on the whole unit. Since the walls need to have grid material installed before final assembly, but since it's a modular unit that can be assembled and dissambled, there are some things that need to happen first and some later. I decided to add door jambs for the doors, to make it more certain that the doors close solidly, and also to prevent gaps through which a tiny finch might escape.  Fitting the door jamb for the large front doors. Looks like a good fit on the left one.Both central door jambs on the rear side of the central pillar of the front of aviaryI had a pair of spice finches in college for a short time, until they both escaped out of the Chinese bamboo cage I had purchased for appearance. 

I started the work this weekend by cutting L-shaped moulding pieces to be installed on the inside of each frame where a door will be installed.  These were done on the table saw, but then cut to size using one of my ryoba. For quick, smooth cuts where fine sizing is helpful, I really like working with the Japanese pull saws.  At this point, I also finished sanding the walls to a fairly rough finish. And I did each of the jamb pieces as I cut them. I only sanded to 80 grit for time, and also due to the fact that it's just contruction material, and the birds will get it dirty soon enough.

Aviary structure held together with clamps so I can stain it

Began Work on the Aviary

  • Posted on: 12 March 2016
  • By: Jay Oyster

Prepping the plansAfter I went out last week to buy BORG lumber for this project, I got started this week cutting the 2-by lumber down to more useful dimensions. I had to stack all of my lumber outside on the back porch this time, since I'm out of room in the shop. Hopefully it'll stay dry for a few days until I can bring it in. (Note: It didn't, of course. We had the wettest two weeks of the year so far right after I posted this.)

The lumber for the aviary stacked outside the back window of the shopEven though I dimensioned for 2"x2" legs, I just used the dimensions of the lumber define it. So all of the members actually ended up 1½" x 1¾". (That's ripping a 2" x 8" into four pieces.) Once that was done, I started the process of chopping to length and then butt glueing and screwing into place. The little birds have hatched and I need to get this thing done quickly.

This thing is going to be modular, so if it's too large to fit through a doorway, I can take it apart into four walls, a floor, and the roof pieces. So I started by framing in the front and back walls with their long legs. Building the front wall of the aviary. Butt joints, glued and screwed.I extended the legs 10" below the bottom of the aviary so that it'll sit up higher. I've got a ton of long screws from the outdoor playset I built the boys back in Florida, so I used those with glue to hold the frames together. After the front and back, I built the side walls. The right side is a simple rectangle, but the left wall has members in the middle to support three little doors for feeding and cleaning the cage.

The back wall of the aviary leaning up against the chopsaw station. I was running out of room in the shop on this project.

Power in a Temporary Shop

  • Posted on: 9 March 2016
  • By: Jay Oyster

As I've mentioned recently, my workshop is a temporary construct. We've moved several times and will move again in the near future. This is the result of our evil banking industry and the fact that when they tanked the world economy, my wife and I were forced to accept a short sale on our Florida home. Rental is never stable, as we found out when our first Atlanta home was needed back by the owner last year. From a shop perspective, that was really too bad, especially since I had invested in a pair of 30Amp circuits in the basement shop in my las rental property. (You're welcome, Mr Landlord.) But the additional burden of moving a shop is that things just get lost.  I still haven't located my random-orbital sander.

Running power down the stairsBut lately, it's been getting even worse. The wiring in this house is absolutely horrendous when it comes to supporting a woodshop. The entire lower level, including our garage and my workshop, are on a single 20Amp circuit. That was bad enough, but then some time during the winter, that circuit just . . stopped. It hasn't tripped a breaker. I can't find a single problem wrong with it, other than the fact that there is no juice at the outlets or lights on the circuit. And since I'm moving soon, I refuse to invest the time and energy into tracking down the problem. Especially since we've reported a ton of fix requests with the renting company. I fear we're getting a reputation. 

Pages