Cutting the tails for jewelry cabinet drawers
Primary tabs
I decided to do dovetailed drawers rather than the simple rabbeted sides I had originally planned, mostly because of how well the sides and feet of this project turned out. Basically, if I had completed things in my normal crappy manner, I would have said 'screw it' by this point and opted for the simple solution.
 That said, I have not truly cut dovetails for almost a year. That's the key down side of being an amateur woodworker. The real skills for handwork take practice, and a hobbyist often doesn't get much. However, even given that fact, I've done enough of them over the past 3 years that I'm hoping these won't turn out horribly. (I set a high bar for myself, no?)
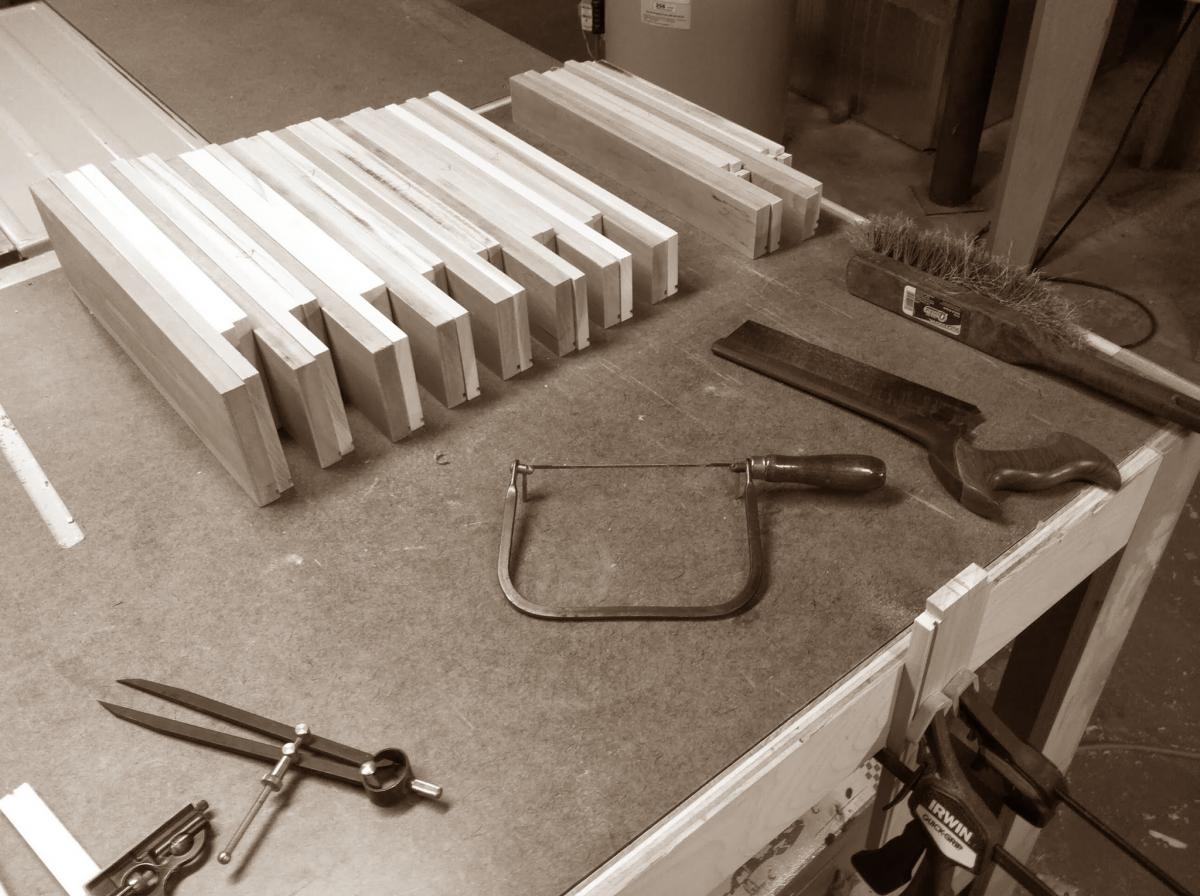
So I've gotten the extra poplar to make the drawer sides and backs, and the 1/4" plywood to make the bottoms, and I've thicknessed all of the drawer parts. And I opted to cut the slots for the drawer bottoms now, rather than after the side joinery is cut. I'm building these sort of the same way I've done simple boxes, and I dont' see a reason not to do that now.
Now it's time to cut the dovetails. I use what I think of as the Gochnour method, only because watching his videos on the FineWoodworking website is how I learned it. I could just as well call it the Klaus method or the Becksvoort method. I start by laying the tails out on the drawer sides using a combination square and a bevel. I tried out a dedicated dovetail angle marker from Veritas a couple years ago and liked them so much that I ended up getting all three, the saddle square, the 1:6 ratio, and the 1:8 ratio ones. For these, I'm using the less agressive 1:6 angles.
For the separation between tails, I used the divider method I learned from Mr. Gochnour. Doing this layout is actually one of my favorite woodworking activities. It's just so connected to the material, and feels . . mindful, somehow. Since I have 10 graduated drawer heights, I opted between evenly spaced tails, and some variation for visual variety on the taller drawers. It has proven really useful to draw my lines extra long. This truly does help in sighting along the saw blade to get an accurate saw cut.
 Rather than going into too much detail (I know, too late), I cut the tail sides with my Veritas dovetail saw. I've tried doing both sides at once, but I don't trust the accuracy as much that way, so I cut them one by one. (I did mark them at the same time, so they're basically the same on both sides of each drawer.) Then I cut off the end pieces by clamping the board to a quick clamping fixture on my bench top. I still don't have my real workbench done, so I'm still using my outfeed table with quick clamping for all of this work. It does make it a bit more time consuming, but my wife will kill me if I delayed this project long enough to finish the Roubo. :-)
Then I clamp each board upright again and rough cut out the waste between the tails using my trusty old coping saw. My coping saw is the same crappy old one I inherited from my father 30 years ago. Aside from one time on one drawer side, when I got a bit too close to the baseline, this process went well. Then I cleaned up the tails using a nice sharp set of chisels. This is my first real workout for the Ashley Isles chisel set I got from Adriana last Christmas.
I've got more pictures of this process in a gallery attached to the project page. Just an apology . . . these were quick photos grabbed as an afterthought with my phone, several of them are rather out of focus. But they're the best I've got. And I didn't get any shots of the finished tails. I'll grab some while working on the pins.
Up next, cutting the pins. I spent almost four hours on a Sunday cutting these tails. I have a feeling it'll be several weeks before I have a similar chunk of time to finish these drawers, especially with Thanksgiving and Christmas holidays around the corner, and two young kids to entertain throughout.