Woodworking Blog

This is the collection area of all of the writings I've made that pertain to woodworking in its various forms.

Chopsaw Station - Added top drawers

  • Posted on: 10 June 2013
  • By: Jay Oyster

Well, I'm really working on Adriana's cabinet right now, so everything else has taken a backseat. But I did manage to create the two small drawers for the chopsaw station this past week. Nothing fancy, just birch ply face and 1/2" ply wides and back, and an 1/8" ply bottom. All rabbet jointed using the table saw.  The right drawer is actually so closely fitted it really does have a piston effect on the air inside.  I may need to drill a hole to let the air out when I'm closing it.  (Nice! :-)

Small drawers fitted into the top of the chopsaw station

Little Shop thing - Base for the LN Dowel Plate

  • Posted on: 10 June 2013
  • By: Jay Oyster

Dowel plate base with holes drilled for the dowels to pass throughI bought the little Lie-Nielsen dowel plate in English units a couple months back, with the goal in mind to use it to create the dowels that will peg the leg tops to the case of Adriana's cabinet. I tried using it a couple weeks ago to make a simple 1/4" dowel. It takes a lot of work unless you've got the pre-dowell pretty close to the proper size. This can be somewhat tricky to do without sneaking into the 'inside diameter' area and giving your dowel an unsightly flat.  But the biggest thing is you really need to be able to clamp this thing down over a hole or a gap in your bench so it's nice and stable while you whale on the predowel piece.  So I got a nice thick old piece of oak, planed it smooth and flat on all sides, chamfered the edges and drilled a series of holes in it so the dowel will go through. Then I attached the LN dowel plate to it using the handy-dandy counter-sunk screw holes LN included at the ends of the plate. 

LN dowell plate mounted on new baseThis makes the plate about 300% friendlier to use. And so much easier to clamp.

Adri's Cabinet - Finally fit the webframe

  • Posted on: 10 June 2013
  • By: Jay Oyster

Webframe dry fit into Adri's cabinet  (Links to Adri's Cabinet gallery)After several weeks of cutting the mortise and tenon joints on the nine web frame drawer divders for Adriana's cabinet, I finally dry fit the whole thing to the case to see how it all works. It took some planing and tweaking to fit each one, but they're finally installed. This is still just a dry fit, I haven't glued anything on this piece yet.  Part of that is just prudence, but the other part is simply fear. When I designed this piece, I didn't thinkit all the way through to detail and decoration, so the second I glue it all up, I'm locking myself out from any more changes. 

Adri's Cabinet: Final dry fit of the cabinet case, with web frame installed

Added left and right guides with stop blocks

  • Posted on: 24 May 2013
  • By: Jay Oyster

I made some good progress on the chopsaw station project the last few days. Last night I managed to get guides installed on the left and right wings of the stand, including stop blocks mounted in some T-track I just bought from Rockler. The Rockler track was convenient because I could stop at the Rockler store down on Roswell road on the way home from work to pick it up. But after buying it I noticed that it's made in Taiwan. I'm not sure but I think the Incra tracks are U.S. made.

Finalized all 22 pendants for the show

  • Posted on: 8 May 2013
  • By: Jay Oyster

Pendant 2-06, Teardrop in African mahoganyI put four coats of spray gloss polyurethane to the pendants (with a final 400 grit light sanding before the final coat.) Glued on some stainless bails that Adriana had (Thank you, Baby!) Took some photos so I have a record of what I made now that I'm hoping to sell them this weekend, and if they don't go there, I'll add them to Adri's Etsy store.  I'm proud of the way these turned out. It emphasizes one of the main reasons I woodwork, I love the appearance of the material. I think that wood, when treated well, is more beautiful than cut gemstones. That's the main reason why I do these little pieces. 

Seafan pendant in cherry and sycamore, 2" x 3"

Added brackets for the No8 Stanley, the LV dividers, and marking gauges

  • Posted on: 29 April 2013
  • By: Jay Oyster

Tool cabinet bracket for No 8 Stanley planeThe slowest aspect of building a tool cabinet is building all of the brackets to hold individual tools. If I had the time to devote away from family and work, I'd have done the entire thing at once, but since that isn't possible, I completed the case, and have been building brackets for individual tools as I get to them. Recently, I completed brackets for my trusty Stanley No 8 plane, my LV dividers, and a couple of marking gauges. I like the way the marking gauge and plane brackets turned out. The dividers bracket still needs a secondary brace, so it doesn't swing around when I open the cabinet's inner door.

Bracket for a pair of marking gauges

A recent blog posting by Chris Schwartz that is Priceless

  • Posted on: 23 April 2013
  • By: Jay Oyster

On April 19th, 2013, Christopher Schwartz posted an important essay on his Lost Art Press blog called "On Technical Perfection". It asks the question of woodworkers, "Should we focus on being technically perfect, or should we instead focus on the design?"  It's a natural topic for him, since Lost Arts is currently preparing a book about just this topic. The book is by George Walker and Jim Tolpin and will be called "By Hand and Eye". It sounds as if it has the potential to be a seminal work.    

But even more impressive than the essay and the forthcoming book, is the discussion that follows his posting. What you can read there is a fascinating (and frankly, astonishing) discussion of the fundamental issues at play when it comes to the tradeoffs between technical prowess and design. Reading through this discussion seems to me to be a bit like sitting around in a room eavesdropping in about the year 1768 on a conversation between James Madison, Thomas Jefferson, John Adams, Benjamin Franklin, and John Locke about what it is about a government that would make it a better sort of government, one that would fulfill the ideals of the Enlightenment.  We aren't in a new golden age of furniture design, but if things go the way they seem to be flowing, we may see one flower within the next few years. (I suppose it follows, since we've only recently seen a new golden age of tools and craftsmanship. It's a natural evolution of an Age for the leading lights to go from the questions of 'How do we do this?' to ones of "What then should we choose to do?")

The Twibill, the English World's Besaigue

  • Posted on: 22 April 2013
  • By: Jay Oyster

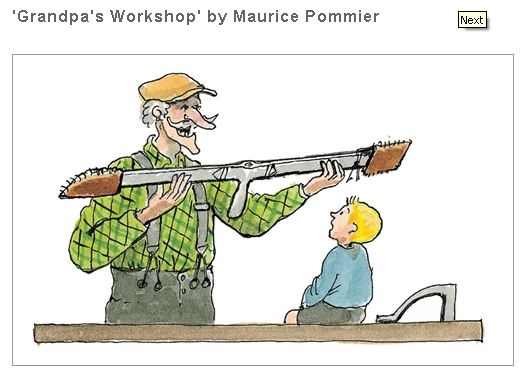
I recently read (and reviewed) Maurice Pommier's children's bookabout woodworking called GrandPa's Workshop. It's a charming book and it introduced me to the uniquely French tool called the besaigue. To a modern American woodworker's eyes, it's an odd, ungainly looking tool, but after hearing how it might be used, I've come to see how it could actually be useful in the right situation. A besaigue, pronounced as best as I can determine as Bay-say-gwe', is a long, double-tipped chisel, with a mortising chisel on one end, and a broad, flat chisel or firmer chisel on the other end. In the middle is a long rod with a handle attached at the midpoint. The purpose of the tool is for timber framing. The long end not being used is placed on the shoulder, and the handle is used to pare down or punch down into a beam to create a mortise. From other reading, it seems to have been commonly used up until perhaps the 17th century along with a large brace and bit to create round-ended mortise slots for structural timbers.


Promotional artwork for Lost Art Press edition of Grandpa's Workshop showing the besaigue in hand
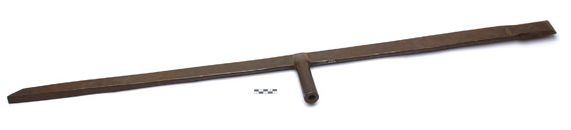
French Style besaïgue from the collection of the Ethnographic Museum of Geneva


French style besaigue, Ethonography Museum of GenevaWhat I didn't learn from this reading, however, is whether or how this tool was ever used in the English-speaking world.  
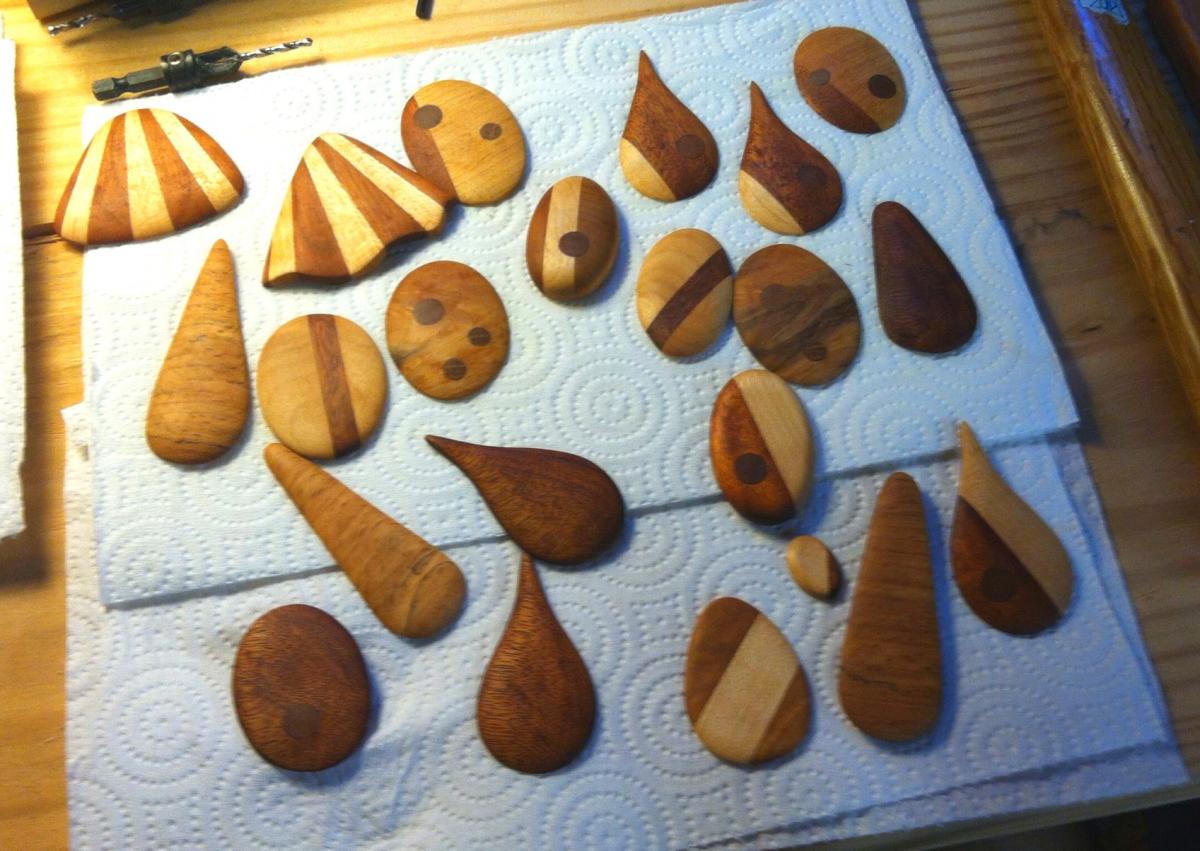
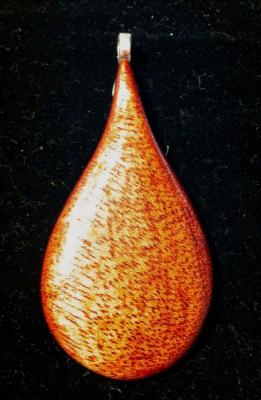

Woodworking Skills Assessment

  • Posted on: 8 April 2013
  • By: Jay Oyster

Stanley No 8, Type 11 Tote and adjuster
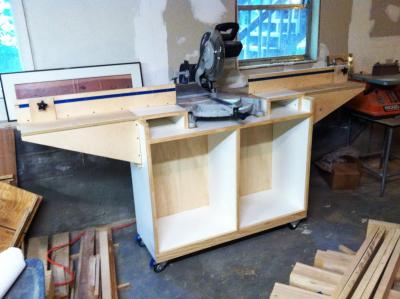
I'm a numbers guy. It's how I'm wired. And I know I'm going to catch flack for this, but I have been wanting to find a way to attach a number to my woodworking skill level. I've wanted to do this for several years. As a slowly progressing amateur who largely interacts with other woodworkers only through social media, I have no other way to judge my own progress.  

I've built a spreadsheet in which I have attempted to score myself in 10 categories of woodworking skill, with as many subsets of each skill as I could identify. The categories I chose are:

  • General Woodworking skills
  • Measuring and Marking
  • Power Tools
  • Hand Tools
  • Joinery
  • Carving
  • Turning
  • Veneering/Marquetry
  • Finishing
  • Specialty Skills

Pages