Project Update

Added Grids, Lights

  • Posted on: 3 April 2016
  • By: Jay Oyster

Opening the roll of PVC-coated wire fencing to start fitting it to the aviary partsI spent about 12 hours this weekend working on the aviary. I finished attaching the doors and door handles over the past week, so now it was time to add the grid or cage material and to finish up some interior work before adding the roof. I mentioned in a previous post that I had ordered the grid from a New Jersey fencing company. It's nice stuff, but it wasn't cheap. Well, it was actually not that bad, per unit area, but I ended up ordering much more than I needed just for this project. I wanted 24" wide pieces, so they'd fit naturally on the 24" wide sides and easily cover the bottom and doors. The label from the Academy Fencing spool
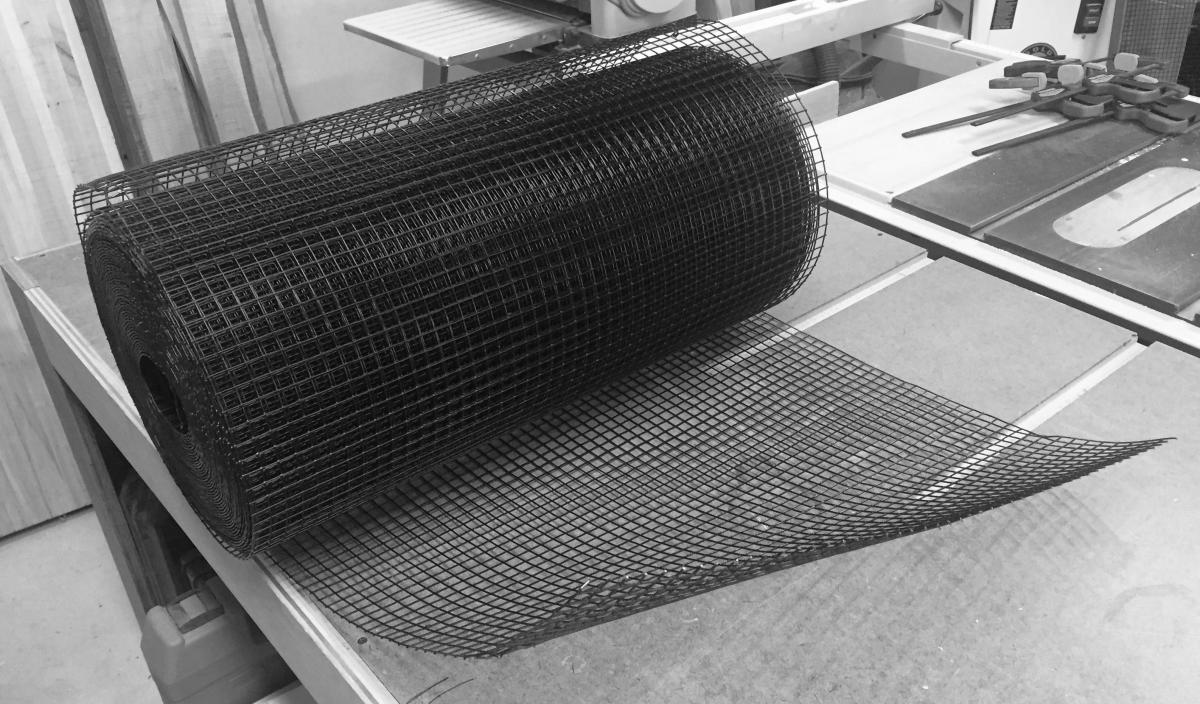
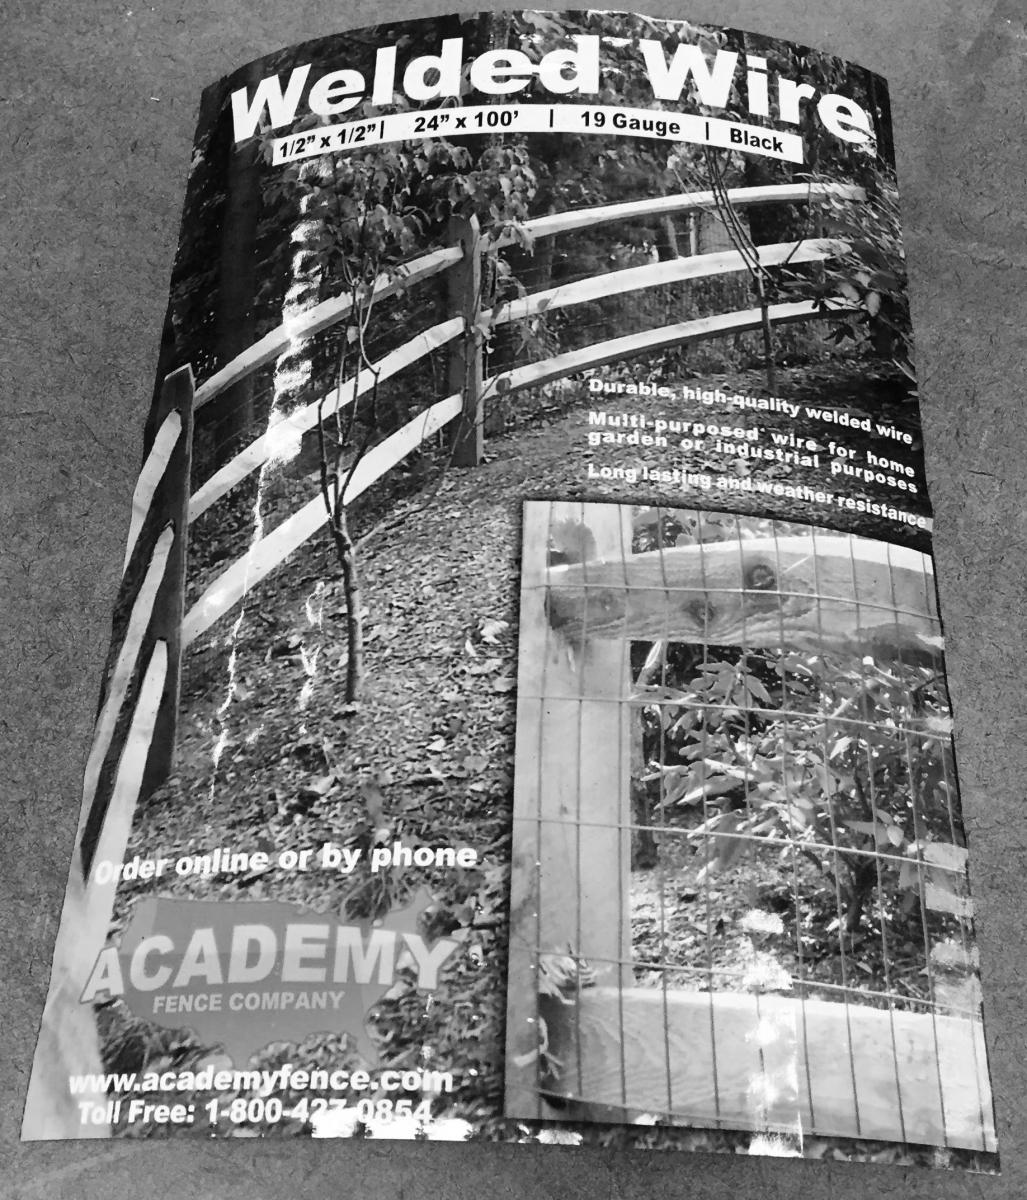
They didn't have the 24" x 50' spool in stock, so I ordered a 24" x 100' spool. That was $90. But that thing was HEAVY, probably close to 60 pounds. Thanks to that, shipping was another $45. I ended up spending as much for the fencing as I did for everything else on this project. I was a bit surprised by the label. It seems they manufacture the stuff, or at least they repackage it themselves. 

Cutting the wire grid with a Dremel tool fitted with a cutting disk
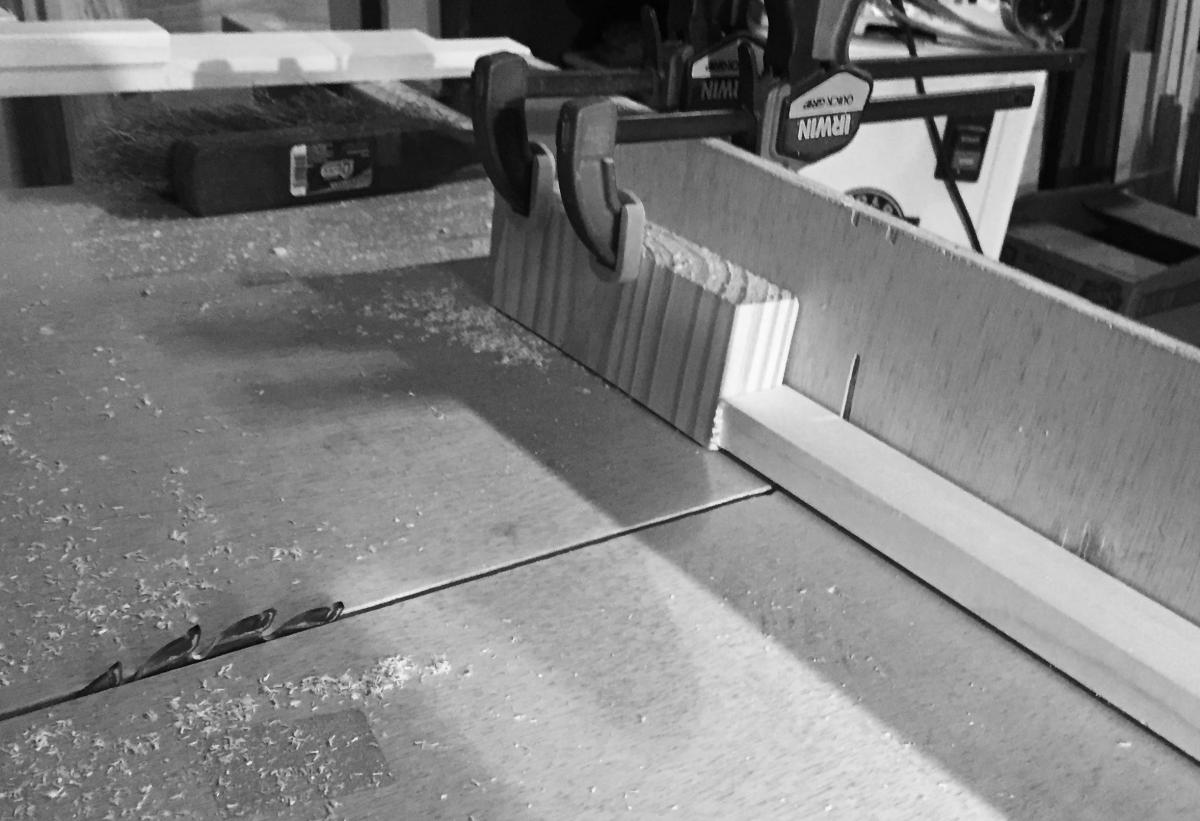
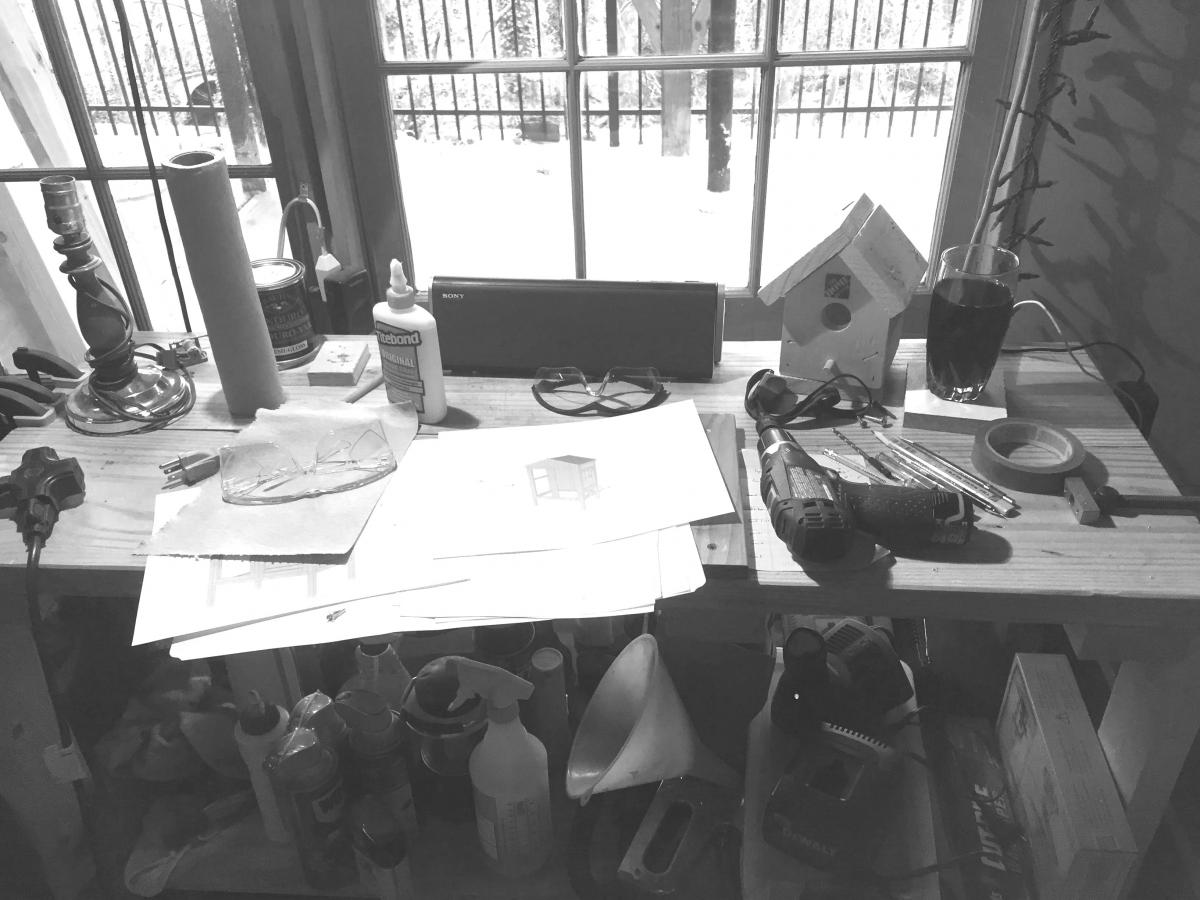
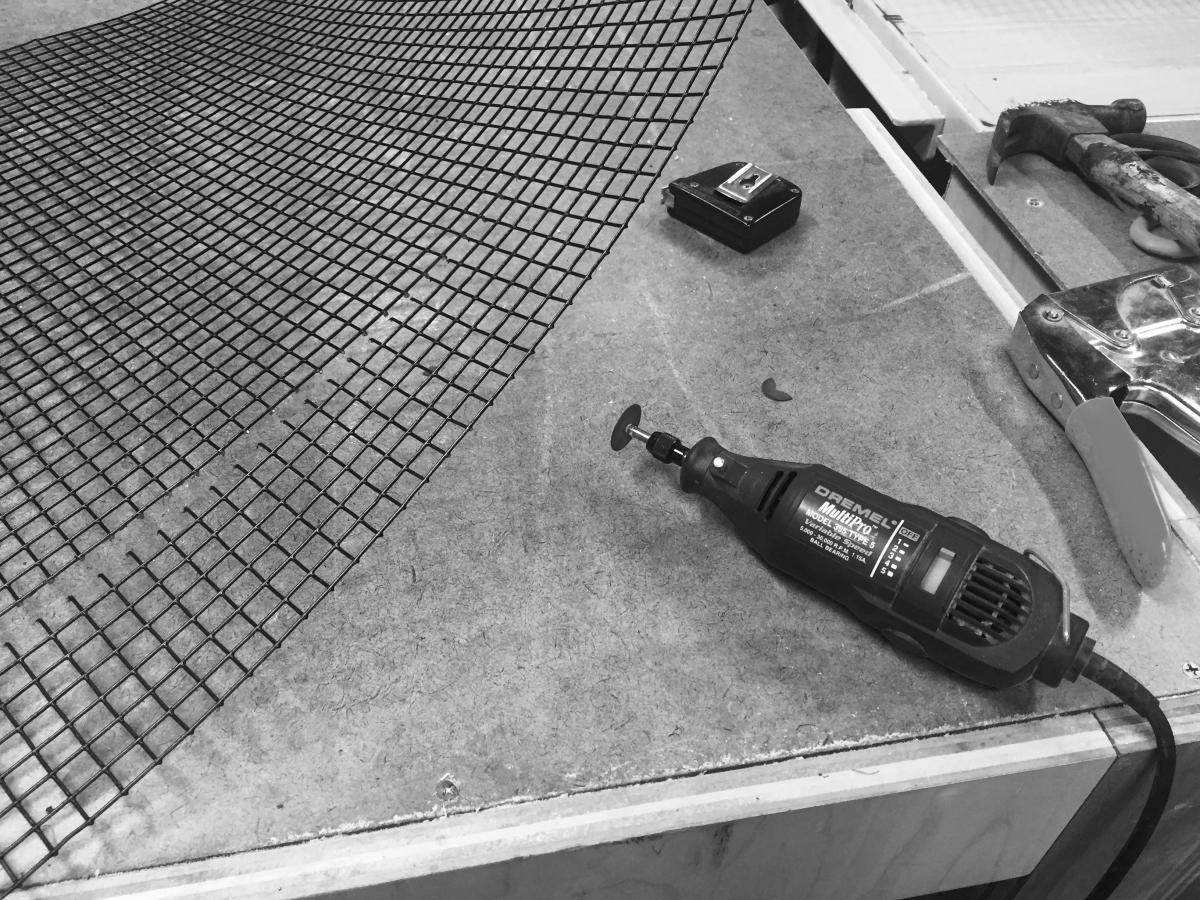
After opening up the spool, i had to figure out how to cut the stuff. I tried tin snips, which did work, but it was slow and it would probably have a) ruined my tin snips, and b) killed my hand by the end of it. So I went and hunted down my trusty Dremel tool and cutting disks. Luckily, I found them in my wife's stained glass supplies. (She steals my tools from time-to-time to finish up her glass projects.) The Dremel worked well, but had to be careful to wear safety glasses and be careful as I cut each wire. Cutting through the PVC coating and then through the wire usually resulted in a little "CHICKt" at the end of the cut, just as the disk exited the back side of the wire. This was the disk catching on the edges of the wires. I went through about 20 cutting disks, each one rather startling me as it exploded off the end of the Dremel. A couple of times I heard the pieces hit the ceiling or the far wall of the shop. Oh, and the smell of the PVC as I burned through it with the cutting wheel . . . not pleasant.

Aviary with doors, grids, and lights installed

Doors and sidewall gap filler

  • Posted on: 29 March 2016
  • By: Jay Oyster

All of the door parts dimensioned and organizedAnother weekend, another update. I'm getting into a rhythm here.

This weekend's goal was to build the front and side doors. Unlike the main structure, which is out of southern yellow pine (SYP), I'm building the doors out of whitewood, which is significantly lighter. I don't want the doors to sag. 

Crosscut sled set up to cut half-lap joints on the door frame partsI ripped an 8' 2x6 down into 1" by 1 ½" strips on the table saw, then cut them to length on the chopsaw. The plan is to half-lap the corners for strength. The doors should be light enough, even with the cage material attached, to stay square. I set up the crosscut sled on the table saw to cut the half-laps. This took some dialing-in. I set it up for less than half the depth and then inched up on the correct fit. I didn't bother installing the dado stack, I just nibbled away with multiple cuts. (AKA, 'The I'm too lazy to set it up' method, or better known as the Norm Abrams method.) Here, you can see that the depth is *not quite* deep enough. Another half-turn on the blade height knob and it was perfect. I also tweaked the location of the stop block a touch to make the overlap perfectly square.

First fitting of the half lap joints on the lower side door. Still a little shallow. I'll need to raise the blade just a touch.AHalf-lapped joint on the corner of the lower side door. Still dialing in the length of the tenon at this point.fter cutting the joints, I then went back and touched them up with a sharp bench chisel to remove any loose cruft between adjacent 'nibbles'. This also smoothed the cheeks of the inside joint enough that the glue joint should be strong. I glued up all of the doors and allowed them to dry for about three hours.

I'm using the quick clamps for everything these days, since most of my nicer clamps are all still packed away in a box somewhere. The sad part about that is that I built a really nice wall-mounted clamp rack for all of my clamps back in Florida, but I just don't have the wall space in this shop to put it up. (Not that I want to drill any more holes in the rented walls in any case.)

Progress has been made. Started mounting the doors.

Door jambs, Test assembly, Stain

  • Posted on: 21 March 2016
  • By: Jay Oyster

Front wall frame laid out in prepartion to fit a door jamb. I cut the L-shaped jamb pieces on the table saw, then cut them to fit with the ryoba.I worked on the aviary some more this weekend. Building a piece of furniture is always an exercise in mental gymnastics, as you figure out the sequence of how things must be assembled and finished on the whole unit. Since the walls need to have grid material installed before final assembly, but since it's a modular unit that can be assembled and dissambled, there are some things that need to happen first and some later. I decided to add door jambs for the doors, to make it more certain that the doors close solidly, and also to prevent gaps through which a tiny finch might escape.  Fitting the door jamb for the large front doors. Looks like a good fit on the left one.Both central door jambs on the rear side of the central pillar of the front of aviaryI had a pair of spice finches in college for a short time, until they both escaped out of the Chinese bamboo cage I had purchased for appearance. 

I started the work this weekend by cutting L-shaped moulding pieces to be installed on the inside of each frame where a door will be installed.  These were done on the table saw, but then cut to size using one of my ryoba. For quick, smooth cuts where fine sizing is helpful, I really like working with the Japanese pull saws.  At this point, I also finished sanding the walls to a fairly rough finish. And I did each of the jamb pieces as I cut them. I only sanded to 80 grit for time, and also due to the fact that it's just contruction material, and the birds will get it dirty soon enough.

Aviary structure held together with clamps so I can stain it

Began Work on the Aviary

  • Posted on: 12 March 2016
  • By: Jay Oyster

Prepping the plansAfter I went out last week to buy BORG lumber for this project, I got started this week cutting the 2-by lumber down to more useful dimensions. I had to stack all of my lumber outside on the back porch this time, since I'm out of room in the shop. Hopefully it'll stay dry for a few days until I can bring it in. (Note: It didn't, of course. We had the wettest two weeks of the year so far right after I posted this.)

The lumber for the aviary stacked outside the back window of the shopEven though I dimensioned for 2"x2" legs, I just used the dimensions of the lumber define it. So all of the members actually ended up 1½" x 1¾". (That's ripping a 2" x 8" into four pieces.) Once that was done, I started the process of chopping to length and then butt glueing and screwing into place. The little birds have hatched and I need to get this thing done quickly.

This thing is going to be modular, so if it's too large to fit through a doorway, I can take it apart into four walls, a floor, and the roof pieces. So I started by framing in the front and back walls with their long legs. Building the front wall of the aviary. Butt joints, glued and screwed.I extended the legs 10" below the bottom of the aviary so that it'll sit up higher. I've got a ton of long screws from the outdoor playset I built the boys back in Florida, so I used those with glue to hold the frames together. After the front and back, I built the side walls. The right side is a simple rectangle, but the left wall has members in the middle to support three little doors for feeding and cleaning the cage.

The back wall of the aviary leaning up against the chopsaw station. I was running out of room in the shop on this project.

Milestone: Finished leg mortises and fit stretchers

  • Posted on: 5 March 2016
  • By: Jay Oyster

Stretchers fitted to legs, with the table top leaning against the wall in the backgroundAfter a great pile of drilling, followed by a whole passle of chisel-poundin', I've managed to fit all eight stretcher tenons to mortises in the workbench legs. This is the quickest work on this project yet. The boys are 9 and 4 1/2 now, so I'm finally able to grab a half an hour here and there to sneak down to the basement and get some work done. (As long as I balance it with other fatherly duties.)

Natural light in the workshop is much preferred, promoting health and good humourNext up, I set aside one four inch wide strip of silver maple to serve as the front edge of the workbench top. I had originally intended to carve a message into it, but the more I think of it, the more I want that edge smooth and unblemished for better work-holding. I think I may, though, carve the message into the front of the leg vice. I'll have to see what looks right. I think I'll still stick with my original message, from 'Two Tramps in Mud Time' by Robert Frost

Completed fitting stretchers to the legs

Workbench Stretchers

  • Posted on: 23 February 2016
  • By: Jay Oyster

Gluing up stretchersIn the last month, I've made some progress. I had finally picked out the pieces to function as stretchers for my bench, sifting through my dwindling supply of silver maple lumber. I don't have anything really thick, so I made each stretcher by cutting a long piece to function as the tenon on each end, and a shorter piece to thicken the center of each part.  I managed to thickness plane and joint all of this rough lumber back around the New Year, then I glued up my stretchers.

Stretchers laid out for mortisesMarking the mortises from the tenons on the legsWith all four stretchers glued and once again jointed square, I laid out the entire undercarriage of the workbench for the first time. I Used the tenons to mark the mortises on the legs. As in the original Christopher Schwarz design, I'm trying to make all of the outer surfaces of the bench fit on the same plane, so the legs and edges of the bench will all serve as bracing surfaces for work.  Having that shared plane for the outer surfaces of the stretchers and legs made it easy to layout and mark the mortises. I just placed both pieces on a flat surface and traced around the tenen end. 

Stretchers glued up and placed for mortise layout

Fixing Door Sag

  • Posted on: 23 February 2016
  • By: Jay Oyster

One thing I've noticed as I've used my wall hanging tool cabinet is that the doors have started to sag. The cabinet box is 3/4" birch plywood, and the doors include face moldings as decoration. That, and the fact that each door holds a full complement of tools means that the doors are very heavy. Even the full length piano hinges i used to attach each door to the frame are not enough to keep the doors vertical. Plus, I suspect that the weight may even bow out the sides of the box.

Tool cabinet door support I had counted on the magnets mounted in the top frame would hold the doors vertical, but that has turned tou to not be enough. In fact, the right door has been sagging enough lately that I can't even get the magnet to engage the steel attach plate. 

Door support block shown from above, screwed from top

Case Back Installation

  • Posted on: 2 January 2016
  • By: Jay Oyster

After the holidays, I managed to grab just a bit of time before heading back to work to accomplish some work on my jewelry armoire project. At this point, I've got only two projects in progress, my two big dinosaurs. The jewelry armoire is now up on a dolly so I can work on all sides. My Roubo workbench parts are glowering at me from a corner of the shop. She'll have to wait. (I've decided the workbench is a 'she'.)

I took a gift I received from my beautiful wife for Christmas as an excuse to put the back on the armoire case. I know that doing the back is usually left until the end, but I wanted to use my new Lie Nielen rabbet block plane to cut the edge rabbets on the shiplapped back panels. When I went to pull the lumber for the back, I realize that, as usual with a project that hangs around too long, the poplar lumber originally earmarked for the job had been used for something else. So I started by going to Home Depot and buying some clean poplar. (Quick and expensive, but no more delays.) I thickness planed the plank down to 1/2" and then sized three pieces for the back.

Shiplapped case back installed

Trued Up the Legs and Thoughts on the Hardness of Silver Maple

  • Posted on: 16 November 2015
  • By: Jay Oyster

Working the tenons on the legsThe last time I tried to rush on this project, I just about screwed up the legs while trying to cut their tenons on the table saw. Over the last couple of days, I got back into the shop and basically treated these like I would a handcut dovetail layout and preparation. Since I don't have a good workholding surface at this point, I've gone back to simple tools and simple solutions. First, I took the two front and two rear legs through the surface planer so that each pair has the same width and depth. The lengths were already accurate. Once that was done, I used hand tools to fix the tenons. Since I glued the legs up from planks of varying thicknesses, I ended up with tenons that are not exactly the same  distance from the front and back of the legs. Instead I focused on the side to side location of the tenons, and making sure that the shoulder is accurately at the same depth all the way around on all four legs. 

I got them to a point where they won't embarrass me when assembled. The tenons, though differing sizes, are all square and beefy enough to hold offset pegs. And in any case, the exact locations of the mortises for these tenons will simply be traced from the tenons themselves after I assemble the whole undercarriage into one assembly. I'm still working on dimensioning the boards for the stretchers. Since I have no boards thick enough to function simply as stretchers on their own, each of the four will once again be a glue up of a wide board and a thinner board. I probably need to sharpen up my planer blades. This maple is HARD.

Finally got the dimensions and the tenons right on the workbench legs

Pulling out Armoire project in Roswell Shop #2

  • Posted on: 21 August 2015
  • By: Jay Oyster

I pulled out the jewelry armoire project last night in an effort to get moving on my two big unfinished projects. I found the cabinet, as completed so far. That's about the biggest accomplishment. The problem is that I've lost the folder of plans for this in the move. It's around in a box somewhere, but god knows where. This means I don't have the hand-annotated cut list and the latest updates to the measured drawings. This is a problem. And on top of that, I have several key parts that I cannot seem to locate anywhere in the shop. This is a bigger problem. Still, while I get my workbench finished, I've pulled all of the parts of this out and stacked them to one side so I can dive in after the bench is done. Crazy as it sounds, I'm kind of optimistic this time. 


This is a salvage effort at this point. These are the parts and the few design drawings I can find.

Pages