Installed wheels, cut parts for wing back walls
Finally got back to the chopsaw station in early May. I finally took the time to install the wheels on the base cabinet.
Finally got back to the chopsaw station in early May. I finally took the time to install the wheels on the base cabinet.
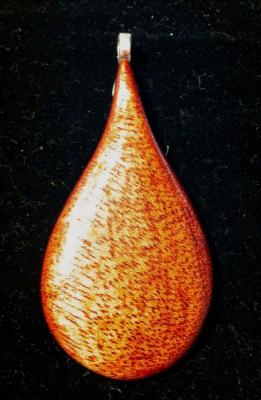 I put four coats of spray gloss polyurethane to the pendants (with a final 400 grit light sanding before the final coat.) Glued on some stainless bails that Adriana had (Thank you, Baby!) Took some photos so I have a record of what I made now that I'm hoping to sell them this weekend, and if they don't go there, I'll add them to Adri's Etsy store. I'm proud of the way these turned out. It emphasizes one of the main reasons I woodwork, I love the appearance of the material. I think that wood, when treated well, is more beautiful than cut gemstones. That's the main reason why I do these little pieces.

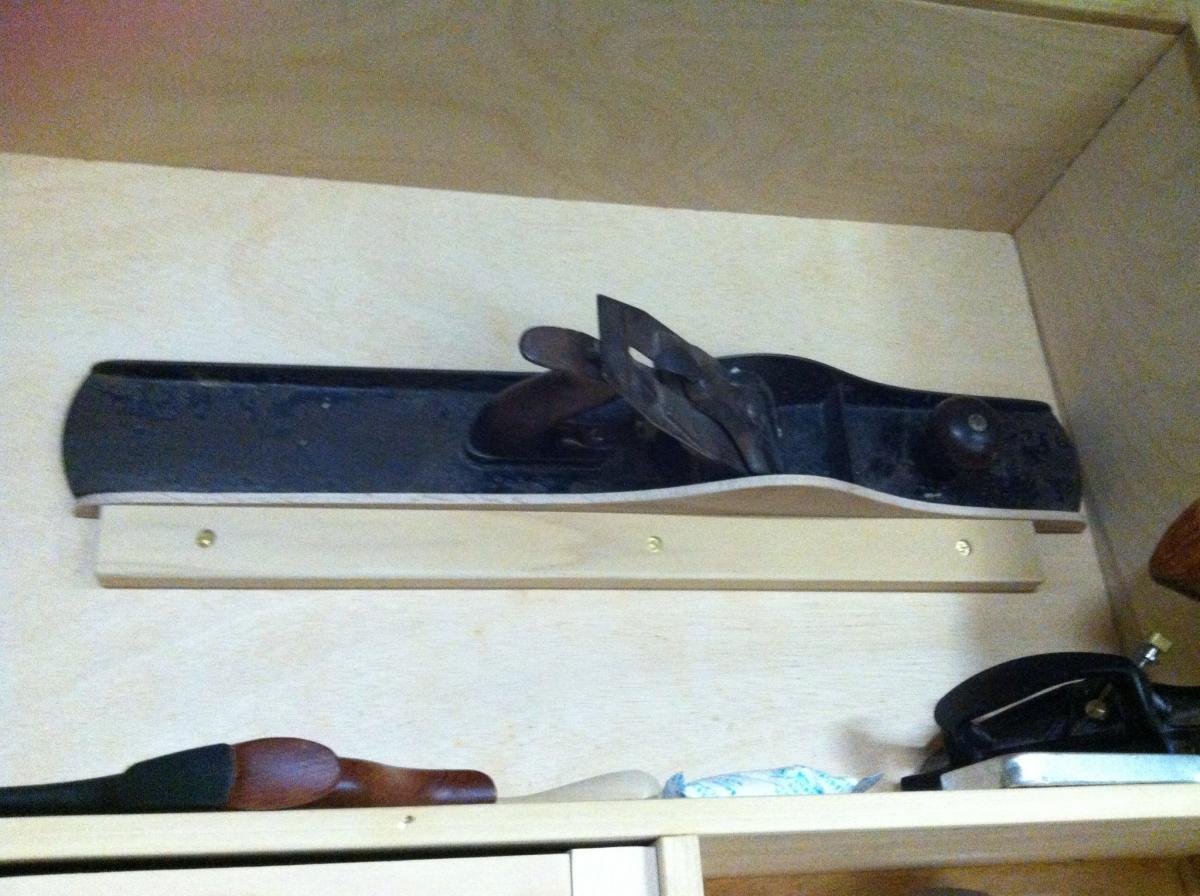 The slowest aspect of building a tool cabinet is building all of the brackets to hold individual tools. If I had the time to devote away from family and work, I'd have done the entire thing at once, but since that isn't possible, I completed the case, and have been building brackets for individual tools as I get to them. Recently, I completed brackets for my trusty Stanley No 8 plane, my LV dividers, and a couple of marking gauges. I like the way the marking gauge and plane brackets turned out. The dividers bracket still needs a secondary brace, so it doesn't swing around when I open the cabinet's inner door.

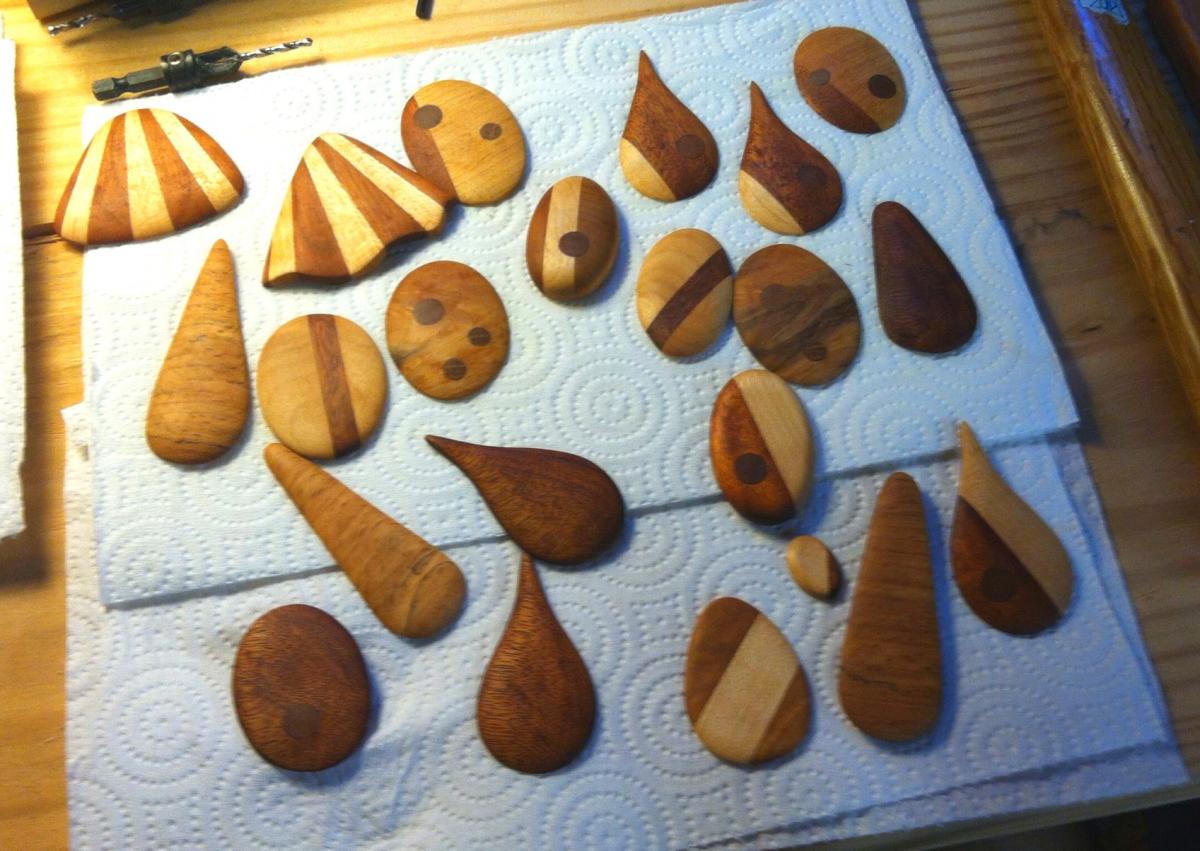
Sanded four more pendants and applied oil finish. 10 to go.
Sanded 8 pieces to final shape and smoothness, then applied BLO.
Work is proceeding, slowly but surely, on the webframe for Adriana's jewelry cabinet. I had cut the tenons on the table saw several weeks ago, but I still need to cut the mortises for all of those tenons.


Just sharing another update on the project to build my wife a jewelry cabinet.

This is an update on the 'jewelry armoire' project I'm doing for my wife. I finalized the design in September of 2011, and didn't really get started until January of last year. Now that my shop is up and working again, I'm making some good progress on it. As of last spring, I had managed to cut the top and sides, and fit them together, but the next critical piece is the case bottom. This single panel is probably the most complicated joined piece I've ever attempted to create with hand tools. (I did cut the panel to final dimensions using the table saw, but after that it was all hand tools.)

In my mid-December push to make progress on a bunch of different projects, I managed to finally add the two 3' wide 'wings' to the chopsaw station.