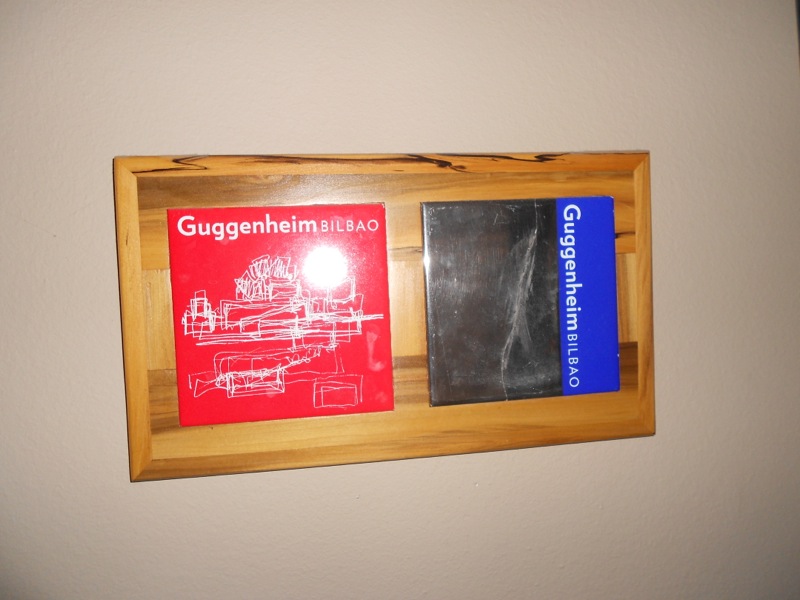
Guggenheim Trivet Tray Frame
Primary tabs

I visited Bilbao, Spain in 2000, specifically to go see the new Bilbao Guggenheim art museum. (I was really into modern art at the time, and Frank Gehry's architecture was still a relatively new thing then.) I bought a couple of ceramic trivet trays as souvenirs. Unfortunately, one of them broke in my luggage coming home. The red one shows the literal 'sketch on a napkin' that was the design for the Guggenheim museum building. The blue one is the one that broke, and in trying to repair it, I kind of screwed up the glazed silver finish. Oh well.
A couple years back, I decided to build a frame to hold them, both as a decorative element but also to protect them from breaking again. I was planning to use it as an actual trivet, but I decided to hang it instead.
This was what I've come to call a 'Much Ado About Nothing' project. It had lots of fiddly bits and was a bear to put together with its miter joints surrounding a wooden field, all made up of smaller parts. Mostly it was an exercise in elminiating gaps in joinery. I dont' know what the wood is, aside from the fact that it is light colored and obviously spalted. It's an old piece that I salvaged from the farm, as are most of my early projects. It could be poplar, or maybe its maple, or maybe birch. Who knows?
This project was basically a design study for the table top build on my green topped entry table. It's three pieces in the middle, all tongue and grooved together. Then this 'ground' is grooved around the edges so I could insert the tonges of the mitered frame. Getting this all to fit together without gaps was a challenge, I can assure you. Once it was all together, I created recesses in the face for the two trivet tiles. The recess was about a millimeter and was done with a full size router. I realized at that point that I need more hand tools and to practice with them. Doing such fiddly work with a router is a bit like trying to go grocery shopping while riding a bulldozer. The trays are epoxied into the recesses.
The finish on this, as is usual with almost all of these first pieces, was brush on polyurethane over BLO (boiled linseed oil). This was about the best look I ever got out of that combination in those days. I liked it so much, I decided to hang the piece rather than using it in the kitchen.
The experience of putting this together was the only reason I managed to get the table top together in anything close to good order on the entry table project.