Fitting the Piece to the Place
Primary tabs
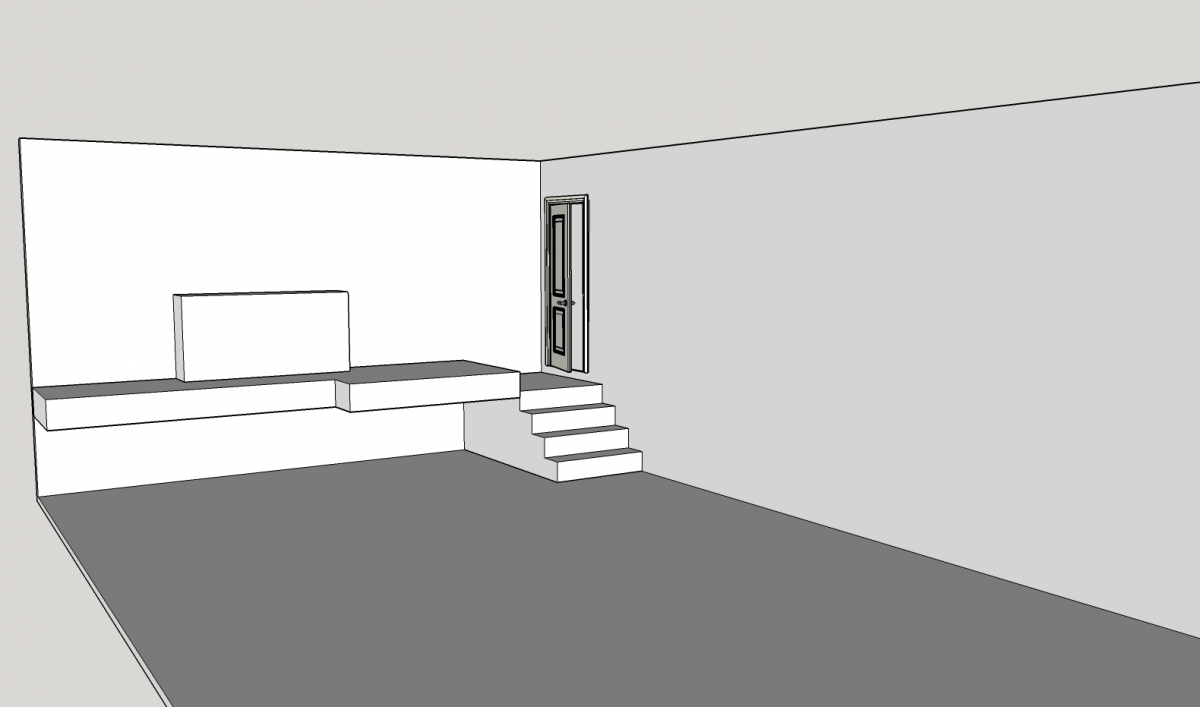 The mudbench is going into the front corner of our garage. As I described on the project page, our garage has a raised deck at the front where the previous owner built a small workbench, and then some storage space where we've got some shelves. The area near the side door into the kitchen was previous just a catch-all space where the kids threw their backpacks and jackets and such. We still want to use it for that, but we want to be able to have some organization, and so I won't be tripping over their shit all the time.
I mocked up the basic space with correct dimension in Sketchup. (See at right) The model doesn't include the railing along the near edge of the deck, and up the left side of the stairs. The workbench is just a 2x4 and plywood structure that I've represented by an accurately sized rectangle in the middle of the deck.
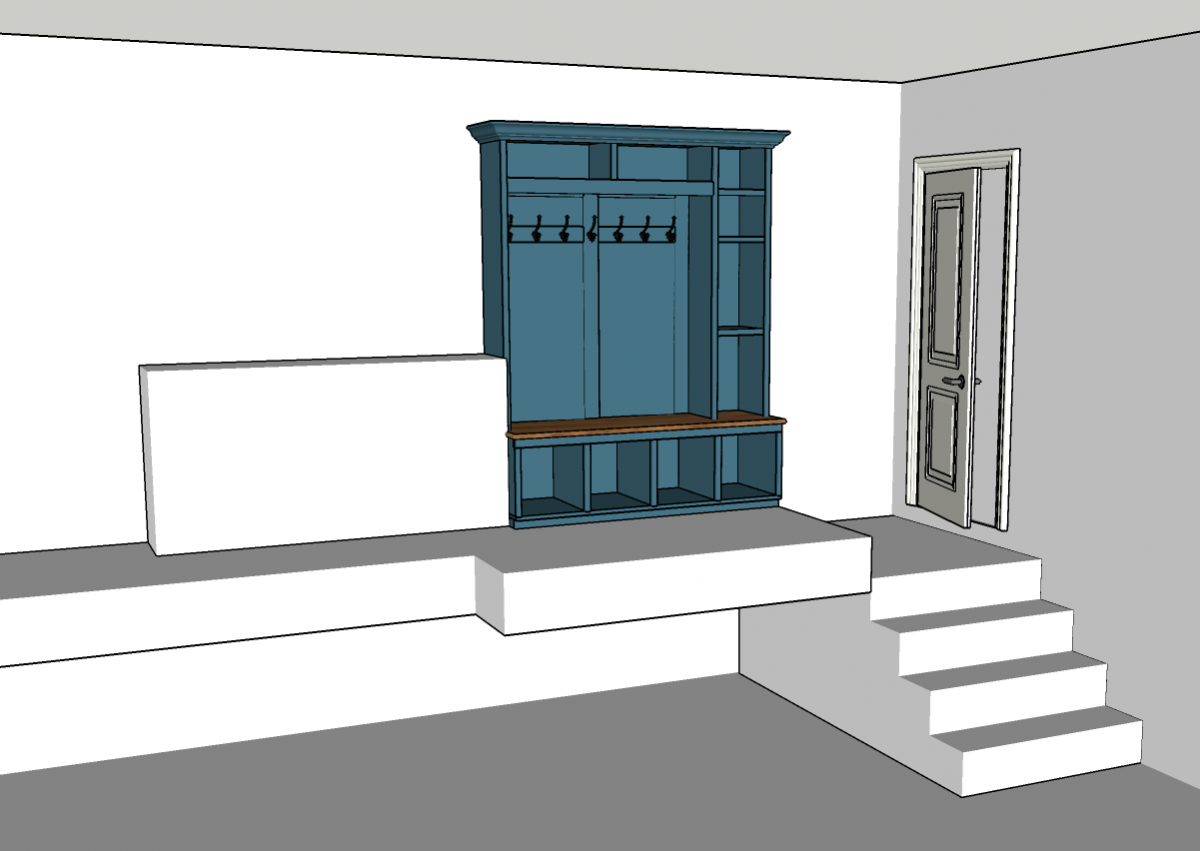
So I took the bench design I worked on over the holidays and placed it in the model to see how it looked spatially, and as a design. To my eye and my wife's eye, it looks good there. She particularly likes the color.
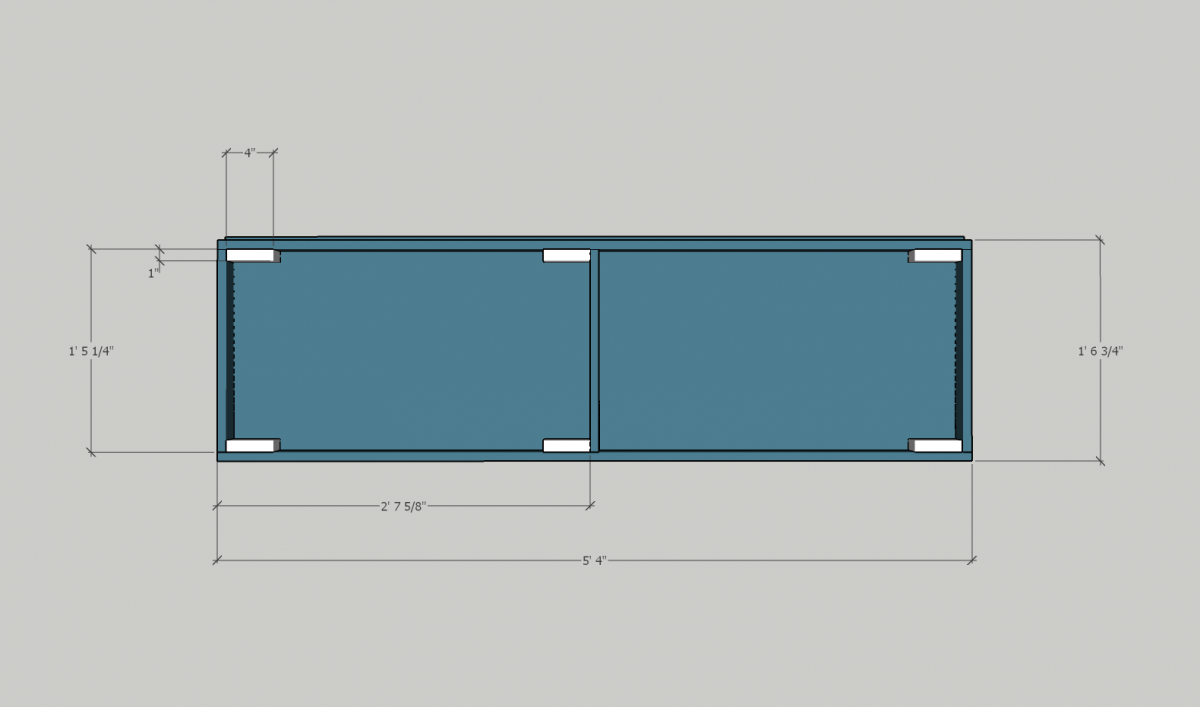 Unlike the original, I'm giving mine a two inch two-kick, and the dimensions allow it to fit snugly in it's spot. It is only about 3" from the edge of the deck. 1' 6 ¾" (47.6cm) front to back, and 5' 4" wide (162.6cm).
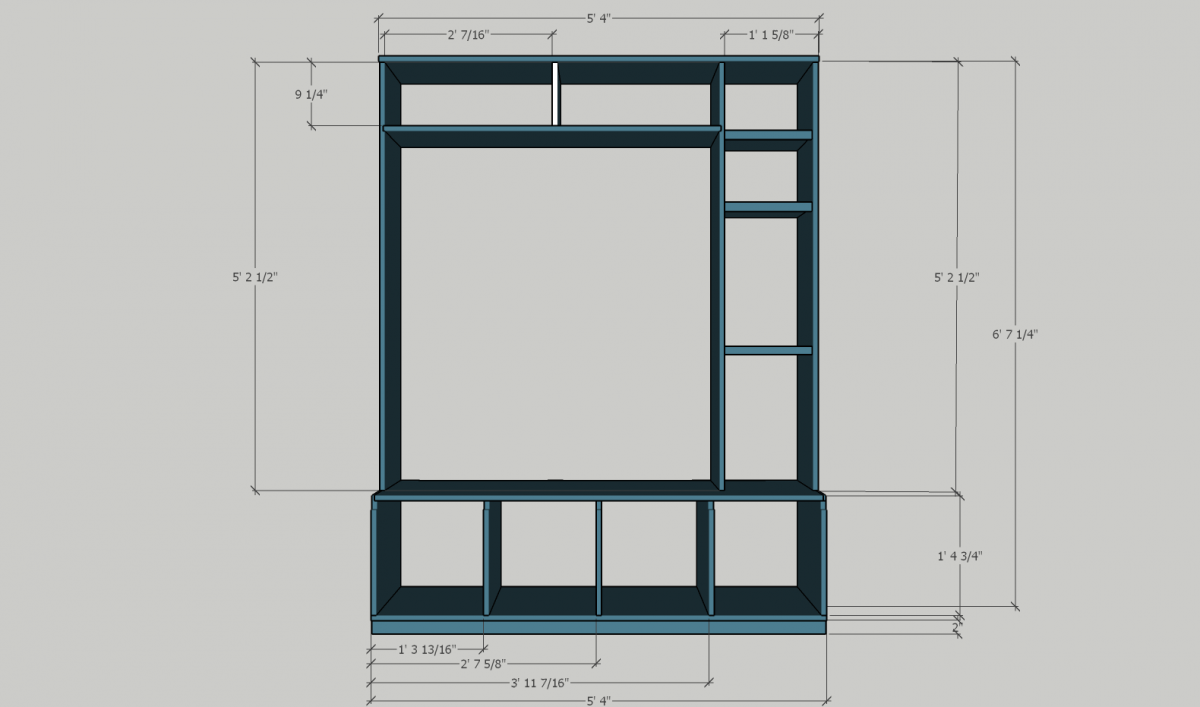 The front dimensions are shown at left. I've also included these image files, and the Sketchup file, on the main project page, should anyone be interested. The main case is 6' 7 ¼" (201.3 cm) tall (without the crown molding), and 5' 4" wide again (163cm).
The bench seat is 1'8" up from the floor (50.8cm).
The bottom section has four evenly spaced cubbies for boots and shoes. The top has two fixed shelves for hats. and the right side includes two fixed shelves at 1/3rd and 2/3rds the height of the enclosure, with an additional floating shelf that can be position as needed. The primary purpose of this right side area is for backpacks.
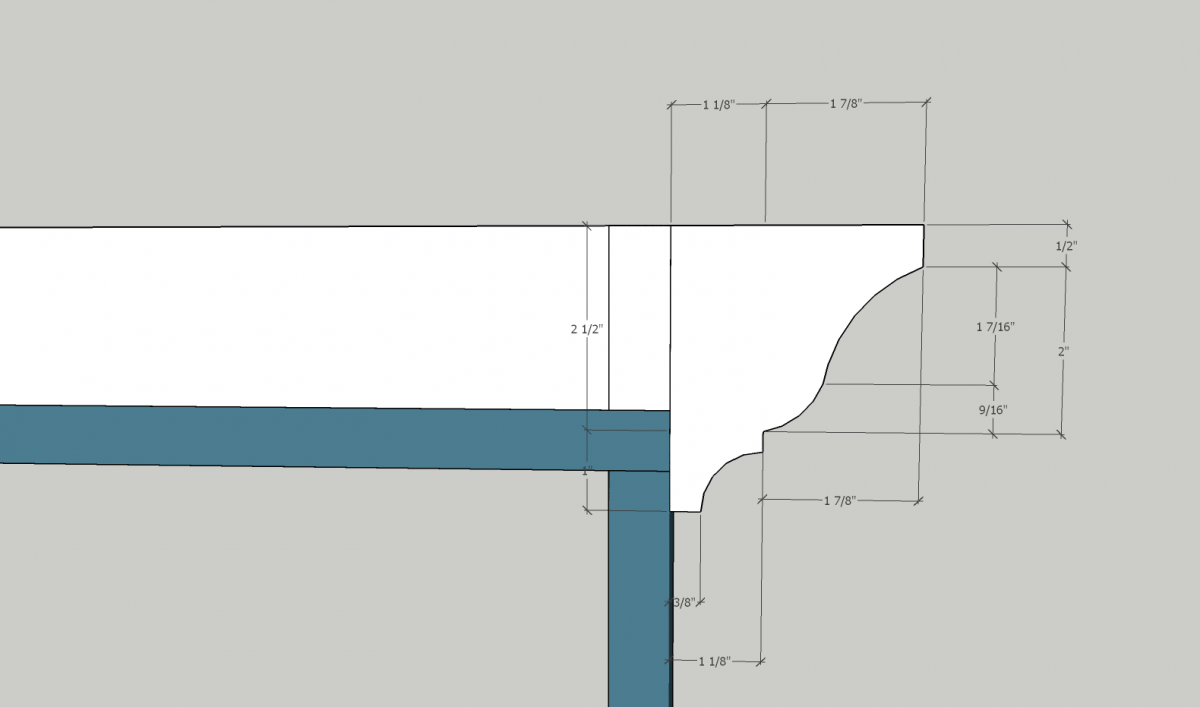 The crown molding is to be made up of some easily milled pieces of poplar in regular sizes. This will be my first attempt at manufacturing a complex molding. I have no molding planes, so it will be all power tools on this one, except possibly for some card scraping to smooth out the profiles.
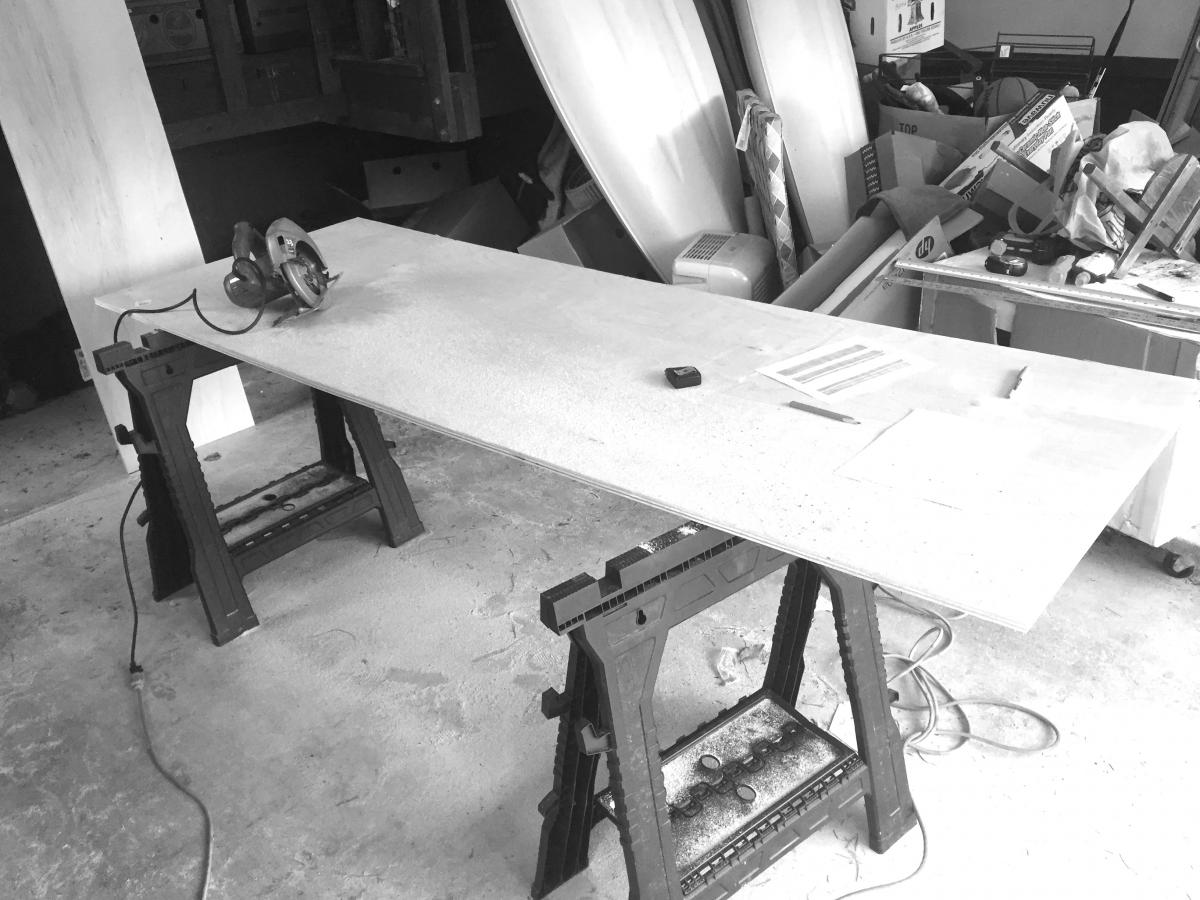 Once I got the ply and poplar home from the home center, I set up a couple of plastic sacrificial sawhorses and cut down the sheets with a circular saw. I just drew lines with a straight edge and cut to the lines. Then and Liam and I hauled the pieces down into my basement shop. I cleaned up all the edges on the table saw.
I've already started building the toe-kick and case, but that's a story for next time.

