Workbench Undercarriage Glued and Pinned
Primary tabs
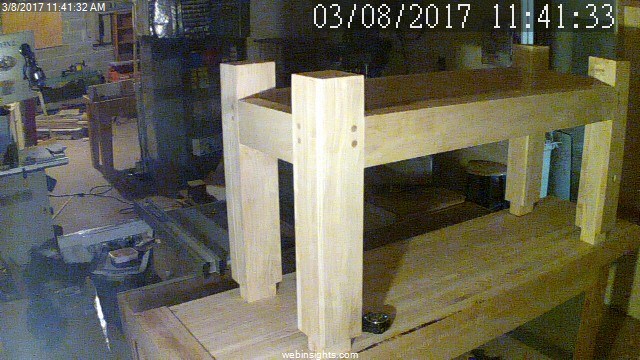 I'm continuing to make progress on the Roubo workbench. After carving the message on the front board, I then glued it to the front edge of the benchtop. Then I set the top aside so I can drill holes for pegs on the bench legs and aprons. Just last night I finished pegging and glueing the legs together. Then I heft the top back up on my outfeed table, upside down. Then I got the undercarriage on top of it, so I can lay out the leg tenon locations on the bottom of the benchtop. I've got it roughly positioned now. I didn't take the time last night to grab a photo, so I'll just show how it looks right now on the webcam.
After I get the position of the mortises figured out, I'm also going to work on installing the Benchcrafted wagon vise. Progress is being made. I'm hoping to have this thing finished this month.
Other activity in the shop right now:
- I got myself a quick, cheap cabinet at the BORG to serve as storage for paint and finishing supplies. Those six or seven boxes are taking up valuable room on shelves in my shop. I just need to set it up and unpack.
- Time to start putting the lathe, router table, chopsaw station, and spindle sander into their final working locations. The paint cabinet is sort of forcing this issue now.
- Major effort to de-clutter. As soon as the bench is done, I need to immediately move on to finishing my wife's jewelry cabinet, and I need to better organized to handle all of the parts involved.
Hopefully, I'll have a shop worth working in soon. RIght now, I'm busy tripping over everything and banging my arms and legs on various protruding tools and boxes. It's not very pleasant. So, before Spring hits in full, I'm planning a cleaning.
