Project Update

Lighthouse update: Touchscreen interface

  • Posted on: 29 August 2023
  • By: Jay Oyster

It’s been a while, huh? The last time I put out an update, I had finished getting the clock and the screen attached to the microprocessor board. Prior to that, I had hooked up the two sound boards and wired some basic speakers in place. This time, I’m going to describe how the touchscreen user interface is laid out. This was a long, iterative process, but I’m just going to describe the features as it ended up. (perhaps with a couple of asides about other things I tried in certain areas.)
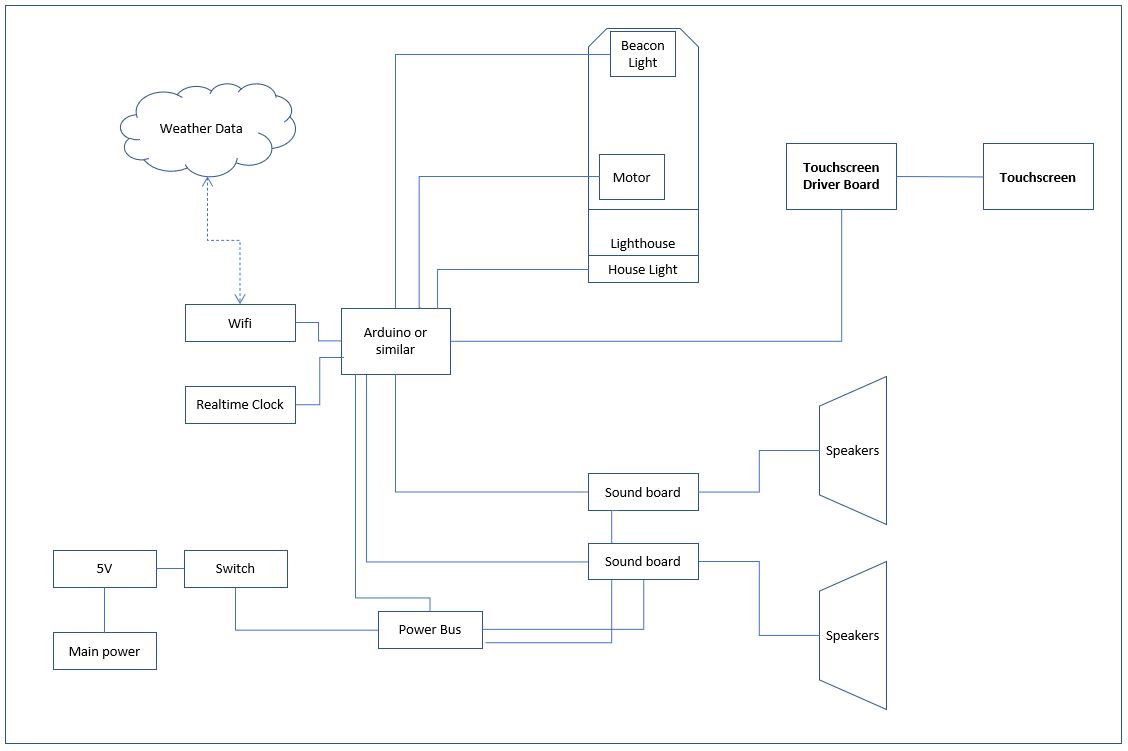
 

Sample of the python-driven touchscreen interface running on the M4 board

Lighthouse update: Adding Screen and Coding

  • Posted on: 19 May 2023
  • By: Jay Oyster

OK, to reiterate where we are in the build of this Smart Weather Lighthouse build, up to this point I had configured the sound files and sound boards to play when triggered, and powered on and loaded Circuitpython on the Metro MX  board. Up next, I'll go through how I got the 4.7" touchscreen attached and operating. And then talk about getting data back to the Metro board using the OpenWeather API, and finally, attaching the clock.

  • Configuring the sound boards, speakers and audio sample files - DONE
  • Setting up the MX board with Circuitpython and activating wifi and basic code - DONE
  • Attaching the touchscreen driver board and touchscreen to the Metro MX board - This update
  • Initializing the Openweathermap API calls for local weather data - This update
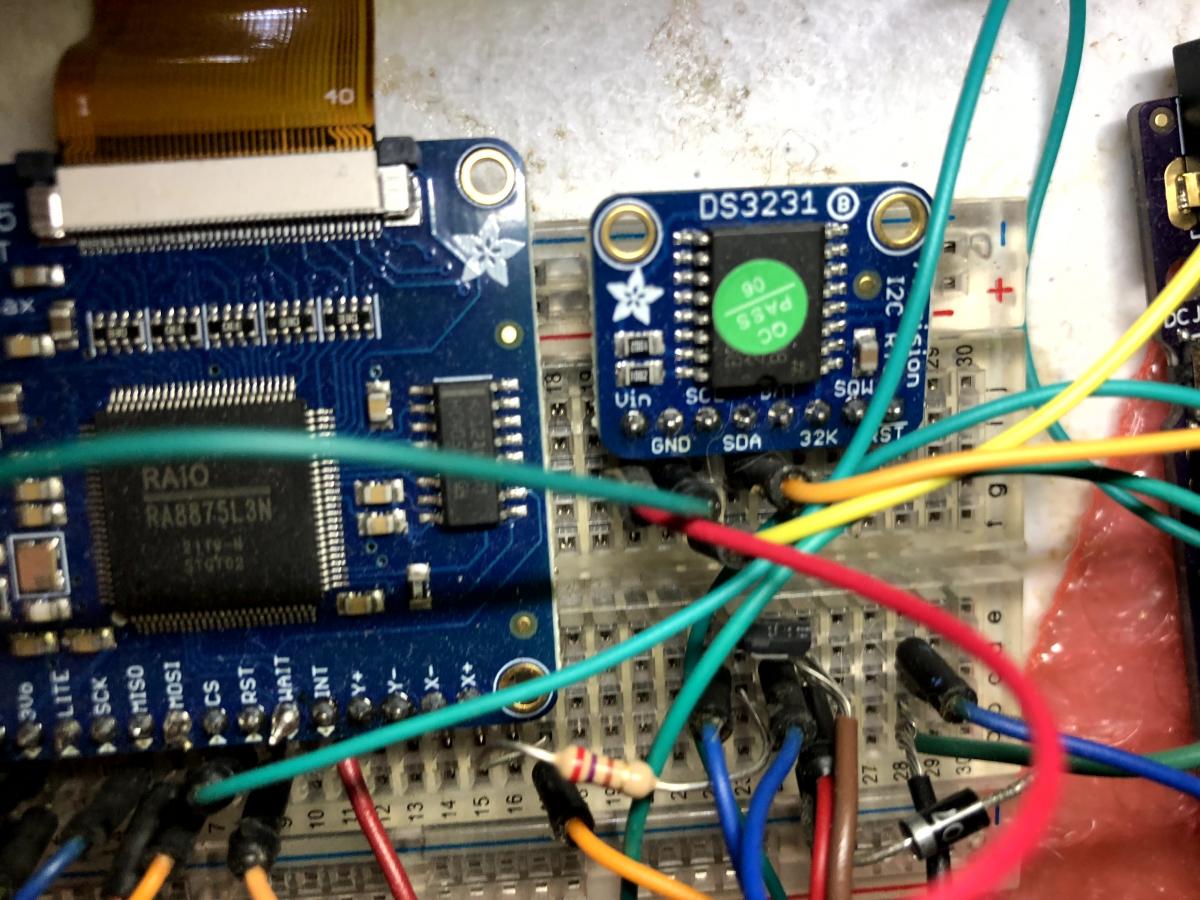
  • Attaching the realtime clock board to the Metro MX - This update
  • Building the basic touchscreen user interface
  • Wiring the lighthouse lights and motor to the Metro MX board
  • Triggering sound effects with the Metro MX Board
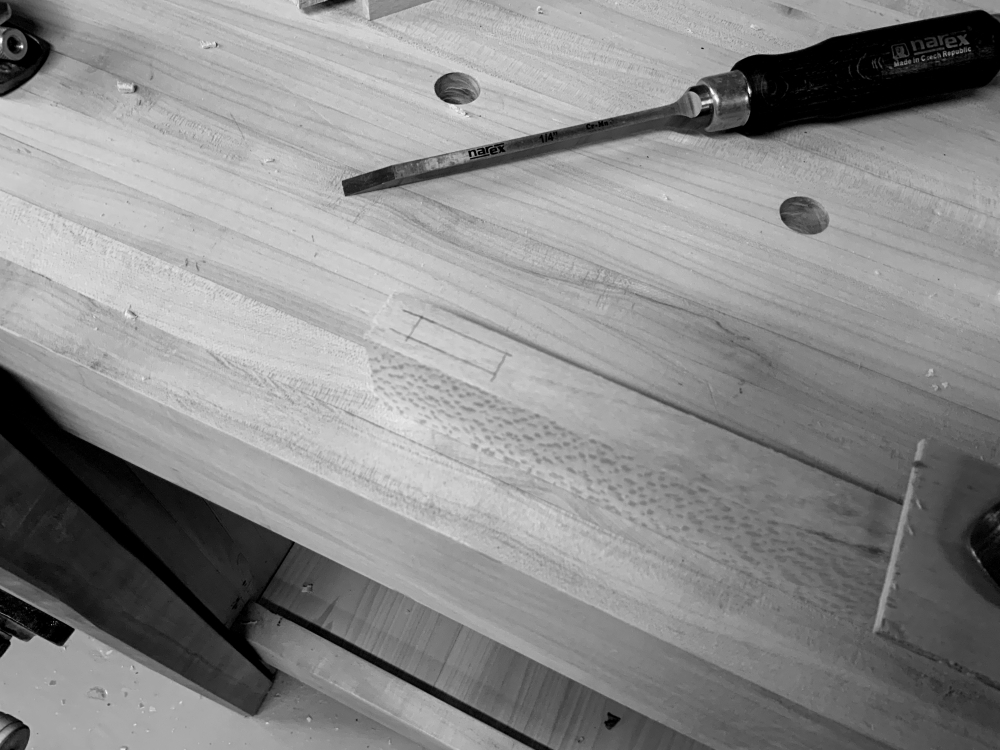
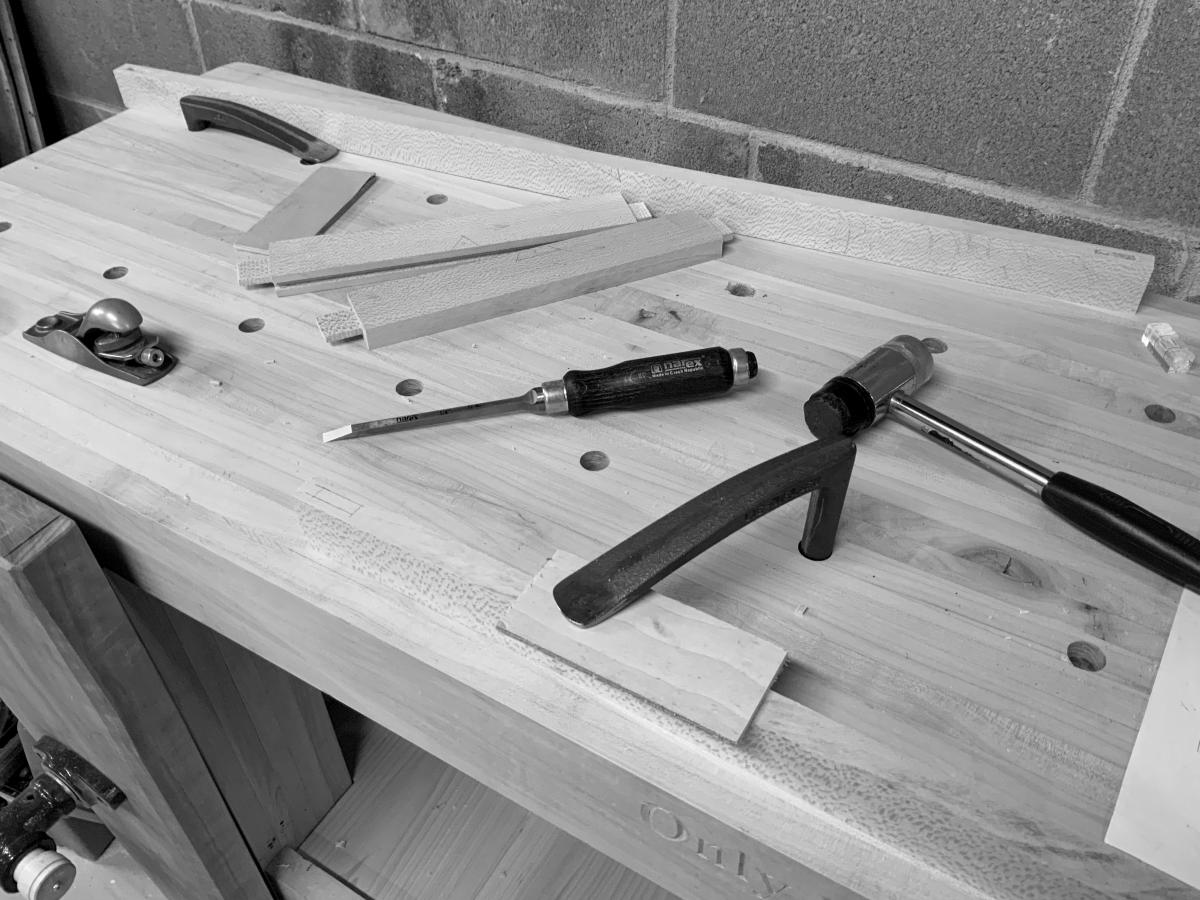
  • Building the wooden lighthouse base Installing the electronics into the base

Screen used: 4.3" 40-pin TFT Display - 480x272 with Touchscreen

Lighthouse update: Soundboards and MX Board Setup

  • Posted on: 17 May 2023
  • By: Jay Oyster

So far, I've described the overall idea for the smart weather lighthouse, and what the various systems of the build will be, but let me lay out the stages to this build . . . since it is a bit complicated. These are the steps I went through to pull it together:

  • Configuring the sound boards, speakers and audio sample files
  • Setting up the MX board with Circuitpython and activating wifi and basic code
  • Attaching the touchscreen driver board and touchscreen to the MX board
  • Initializing the Openweathermap API calls for local weather data
  • Attaching the realtime clock board to the MX
  • Building the basic touchscreen user interface
  • Wiring the lighthouse lights and motor to the MX board
  • Triggering sound effects with the MX Board
  • Building the wooden lighthouse base
  • Installing the electronics into the base

I have to say that I couldn't have pulled together all of the electonics and coding without the excellent support of the Adafruit projects and learning pages.

Adafruit Soundboard FX board with headers and speaker terminals

Lighthouse update: Block Diagram and Prototyping

  • Posted on: 3 May 2023
  • By: Jay Oyster

OK, thinking back to the beginning of this effort in January and February, I had a basic idea of what I wanted to accomplish in this build. First, I wanted the lighthouse itself to look pretty-much stock, as designed by Lego. I just want it to function with more autonomy.

Block diagram of the electronics

Basic design of the lighthouse automation systemSo starting with a basic set of functions and I how I saw it coming together initially . . . this is not that different from what I ended up building. Here are the basic components:

Prototyping the electronics for the updated lighthouse

Beginning Main Box Joinery

  • Posted on: 10 April 2023
  • By: Jay Oyster

I haven't posted on the Tansu Teabox project in quite awhile, but I have been working on it. Slowly, as ever. But after a couple of major side-tracks in the maintenance of my basement shop, I also had problems with my website, as I've mentioned elsewhere here. But in between, I did manage to make a bit of progress on the teabox. Last December, I finally resawed the sidewall pieces to the 1/4 to 1/2" thick pieces needed for the box shell, and planed them down and joined them, then cut to final dimensions.  Through all of that, I neglected to take any photos. 

But after a major effort to fix the flooding problem in my shop this past year, I got my tools put back . .  in particular my workbench. With the bench back, I started working on the dovetails for the teabox case.

Cutting dovetails of the main box case

Tansu Teabox: Basic dimensions and cutting raw parts

  • Posted on: 22 November 2021
  • By: Jay Oyster

For the teabox, I laid out a basic step-style tansu cabinet layout, with 10 drawers and two doors, and space at the top right where I can put a couple of steeping tea cups.

So the dimensions I started with to determine what size to make the teabox were the two Adagio tea infuser mugs, similar to this.  Each of these is about 3 1/2" wide and 5" tall, with the infuser and glass top  in place. I decided to use the top step of the box, on the right side, as a place to store these two mugs. So a 5" step down from the top height. 

The overall box height is limited by cabinets in our kitchen. That's 16" of space. 

The width needs to fit in with the rest of our counter items. I decided to go a bit wide, so 20". It'll be a focal piece in our kitchen.

In terms of depth, I wanted the drawers to be functional, not bottomless cubbies I couldn't reach the back of. I thought between 5" and 7" deep. So I split the difference and decided on a 6" deep box.

Labels for the parts list

Finishing side doors and adding hinges

  • Posted on: 12 October 2020
  • By: Jay Oyster

Cutting recess to house side hingesCompressing a bit of the work here. I built the side doors, mortise and tenon corner joints (See photo), routed grooves for the panel. I glued up the center panel of 100% quarter-sawn sycamore. Finding clear, white pieces of sycamore among the remaining stock I had was a big challenge. In the end, I managed to get a clear face on one side for the outsides of the door. I debated what to do about the inside of each door. Finally, I opted to use some of the washi (Shoji screen paper) I had ordered for the front door, and taped in down at the edges on the inside of the door, covering the panel. I'll show photos of that on the completed project.

But up next was mounting the side doors. I ordered two pair of the smaller 1 1/4" tall Brusso (CB-302) butt hinges. Damn they're expensive.  And I suppose that they're worth it, but it is such a premium these days to support American manufacturers. I did take some photos of the process as I cut the shallow mortises to house the hinges on the doors. Rather than a router, I just used some newly sharpened chisels and cut them out by hand. 

January 2020 - Bringing the Project back to Life

  • Posted on: 30 January 2020
  • By: Jay Oyster

OK, after moving four times in six years, I had two projects that I'd dragged along all across those moves . . . my workbench, and my wife's jewelry cabinet. Both projects were approaching 10 years from start, and I was both embarrassed and tired of not having them done. So last year (2019) I finally finshed the workbench. And in January 2020, after doing a bit of a reorg in my shop, I was finally ready to make the final push to complete the Jewelry cabinet.

Using the newly finished workbench to build the side doors of the jewelry cabinetI didn't even know for sure if I had managed to keep all of the pieces to build the rest of it. So the first thing I did was to assess the project and find the cut parts in amongst the piles of wood that I moved between the various houses. I did find all of the pieces, especially for the side and front doors. But it was a bit of a jigsaw. The side doors, particulalry, had several large pieces of fairly thin quarter-sawn  sycamore that I need to glue together into panels. And I knew that I couldn't get two faces that were clean, meaning two faces of white sapwood. So a big part of the next step was deciding on an approach to glue up and size the panels for the side doors. 

After reclaiming the shop, I needed to assess where I left the jewelry cabinet project

Final week of work to finish mudroom bench

  • Posted on: 10 November 2018
  • By: Jay Oyster

Finishing up the paint. Benchseat not yet installed.September 2018 - I got some help to move the case up from my basement shop to the garage. Thank you very much Kamil. Once it was in place there, I worked on getting the crown molding installed, as well as the lighting. Once those were in place, I took a couple of weeks to paint the whole piece with General Finishes "Charleton Blue" chalk paint. It took two coats with a quick sanding after the first. 

Finished bench, seat installed, lighting working, hardware installed.October 13, 2018 - This is the weekend I finished this project. Sprayed the whole case with lacquer. (I don't have a HVLP spray rig, so it was rattle cans from the  big box store. $12 a pop for those cans, but the result was worth it. ) 

Then it was the struggle of getting the 2 1/2" thick cherry seat installed. Boy, that was a challenge. It had fit perfectly in the shop, but of course, after the paint was applied to the case, and of course the higher humidity of the garage space where it's installed, it didn't quite fit. I had to haul the seat back to the shop and sand and plane a bit more to get the clearance needed to make it fit. It's a very tight fit, specifically in the center where the seat fits tightly around the center vertical shelf piece.  

Pages