We looked on Amazon for pre-built large bird cages, but didn't find exactly what we wanted. The closest we found was an attractive model from Trixie, but my wife wanted it to be wider so the finches would have more room to fly. The second consideration was that it needed to be fairly easy to build. Third, and probably most critically, it needed to be built around whatever metal cage grid I could buy in large enough format so that I didn't have to piece together smaller cage grills. And fourth, I wanted to keep the cost down, so I planned to build with plain old construction lumber that I could buy in a big box store.
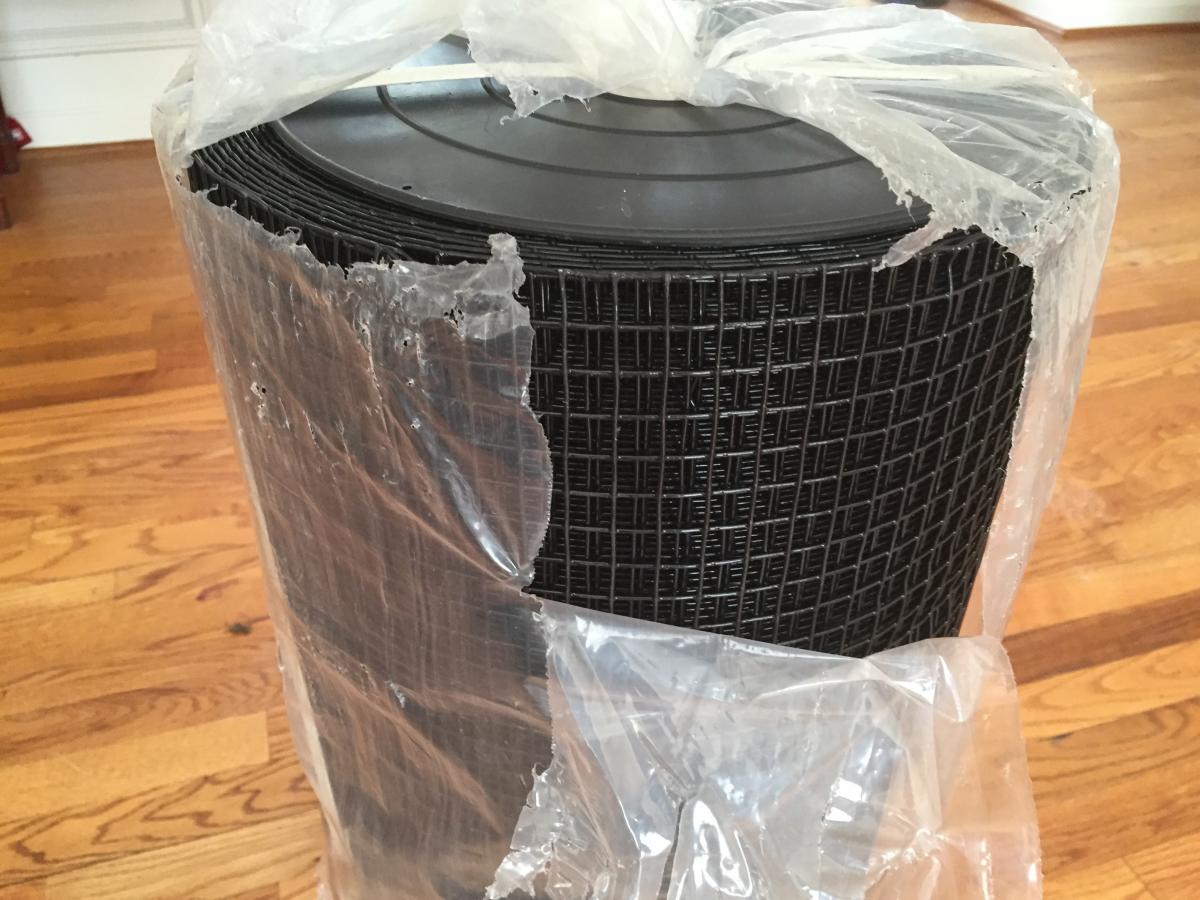
After watching a bunch of Youtube videos by people who've built bird aviaries, I realized I needed a bit more specific detail. Who knew that there were so many considerations when housing birds. The Youtube bunch had built to house a variety of birds, from parakeets all the way up to giant eagles and owls. Obviously, the materials and constraints change when you're desiging for a parakeet vs. an owl. In many ways, finches are easy. Their beaks are small enough, you don't have to worry about them snapping thinner grill materials, (something you *do* have to worry about for large parrots and raptors.) But finches are also very delicate, and will quickly die if exposed to unfortunate chemicals, like the stuff used to treat pressure-treated lumber, or the zinc used to coat most wire products to prevent rust.  I found the most useful information in a pet finch discussion forum. People have used everything from plastic screen material to those wire shelving units for closets. Someone there suggested an online fencing company out of New Jersey as a good place to find many options. For this application, the right material turned out to be 1/2" x 1/2" PVC vinyl-coated welded wire mesh. I ordered a 24" by 50' spool. Academy Fence delivered quickly and the stuff is exactly what I needed. Shipping was expensive, but I have enough material for two (or possibly three) of these giant aviaries, and the material itself was a good deal compared to other options. If I know my wife, I'll probably end up building a second one at some point.
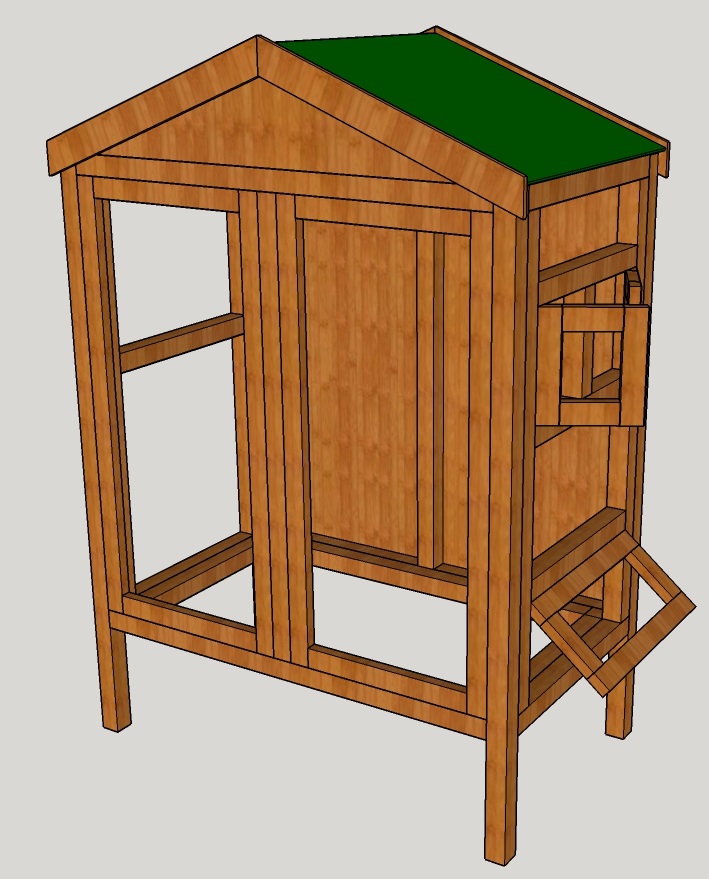
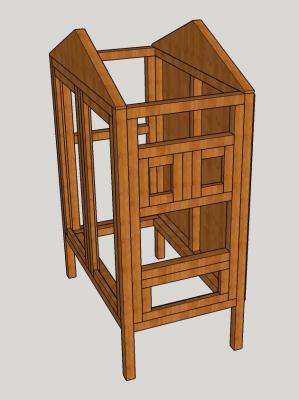
 Ordering and receiving the grid was the key. Once that was in-hand, I could design around the dimensions of the fencing material and the construction lumber I would buy to size parts. I broke out Sketchup and designed it from the ground up.
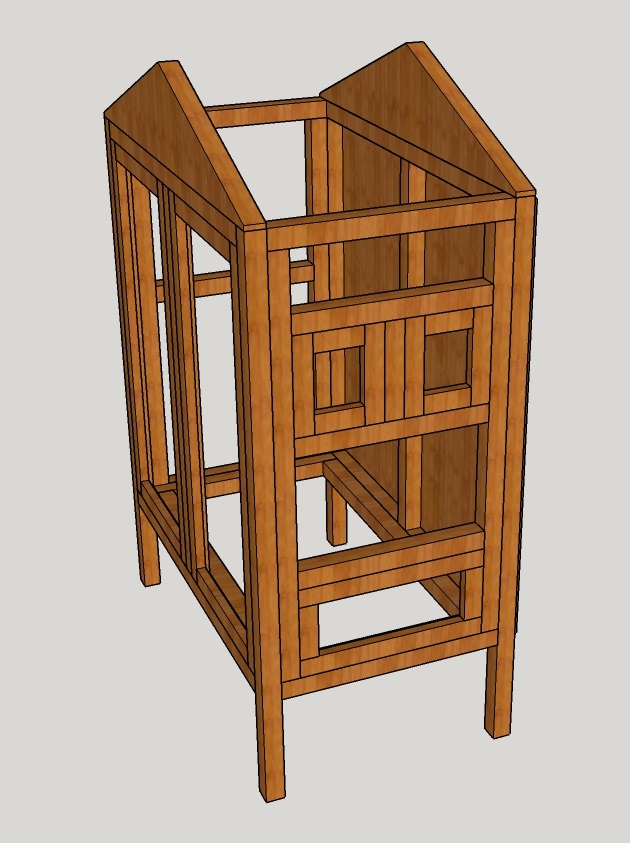
Note: I update from the design in the Sketchup file. This is a large bird cage, but once I cut the legs, I realized the top would actually be just about at my eye level. I decided I wanted to be able to see the birds, too. So I lengthened the legs by 10", moving the entire structure up 10" higher off the ground. I'll probably also reinforce the legs with a shelf near the ground to strenthen them. The longer legs with lots of weight on them, particularly with casters mounted in each leg, make me nervous.
Here's the design as finished in the Sketchup file:

3/28/2016 -- Note, when building around 24" wide fencing material, it may make more sense to make the depth just a bit wider than 24". Ended up cutting one row of the grid material off for the bottom and walls.
4/3/2016 -- The left wall, as designed, doesn't leave room for the grid to be attached to the wall and then the bottom of the structure to be installed. I ended up installing the grid on the top half and attached the bottom to the bottom half of the bottom piece of that left wall.


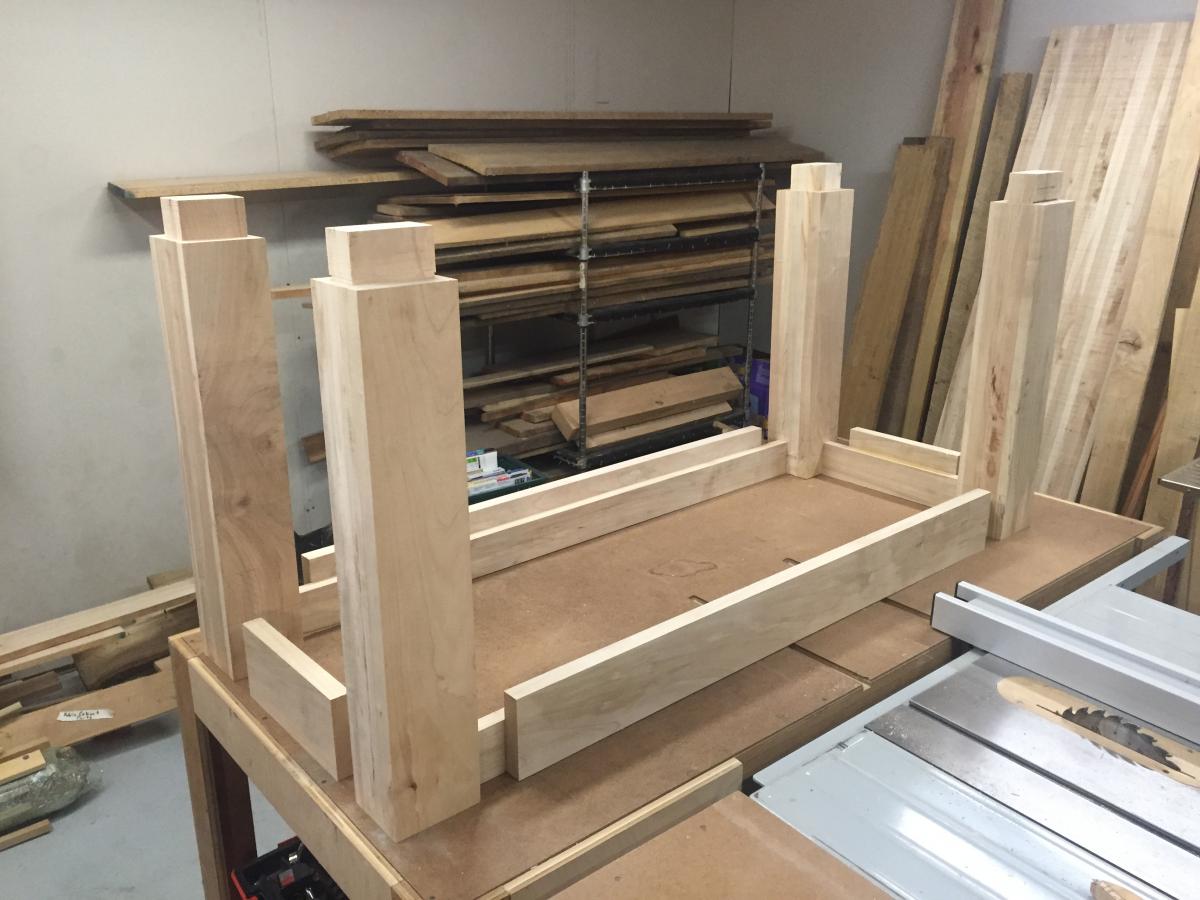
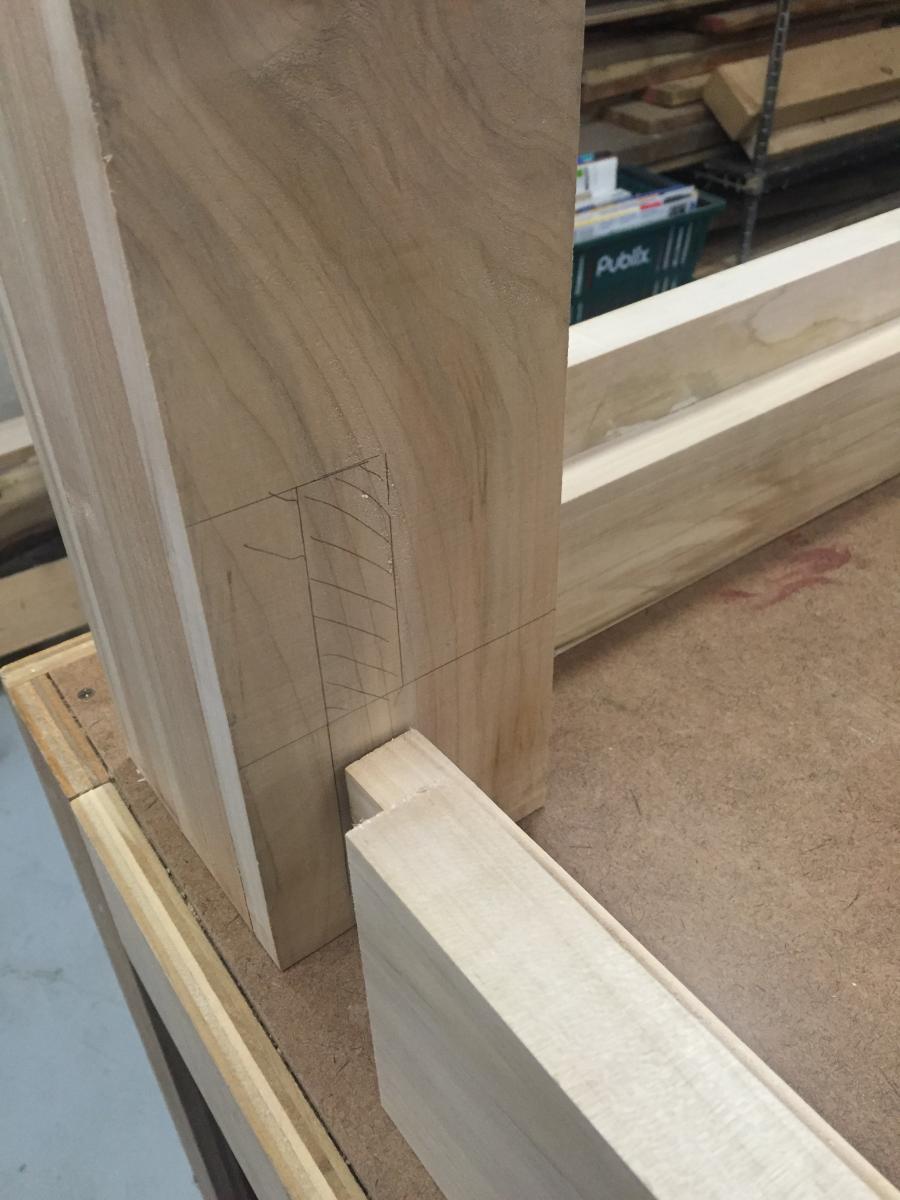
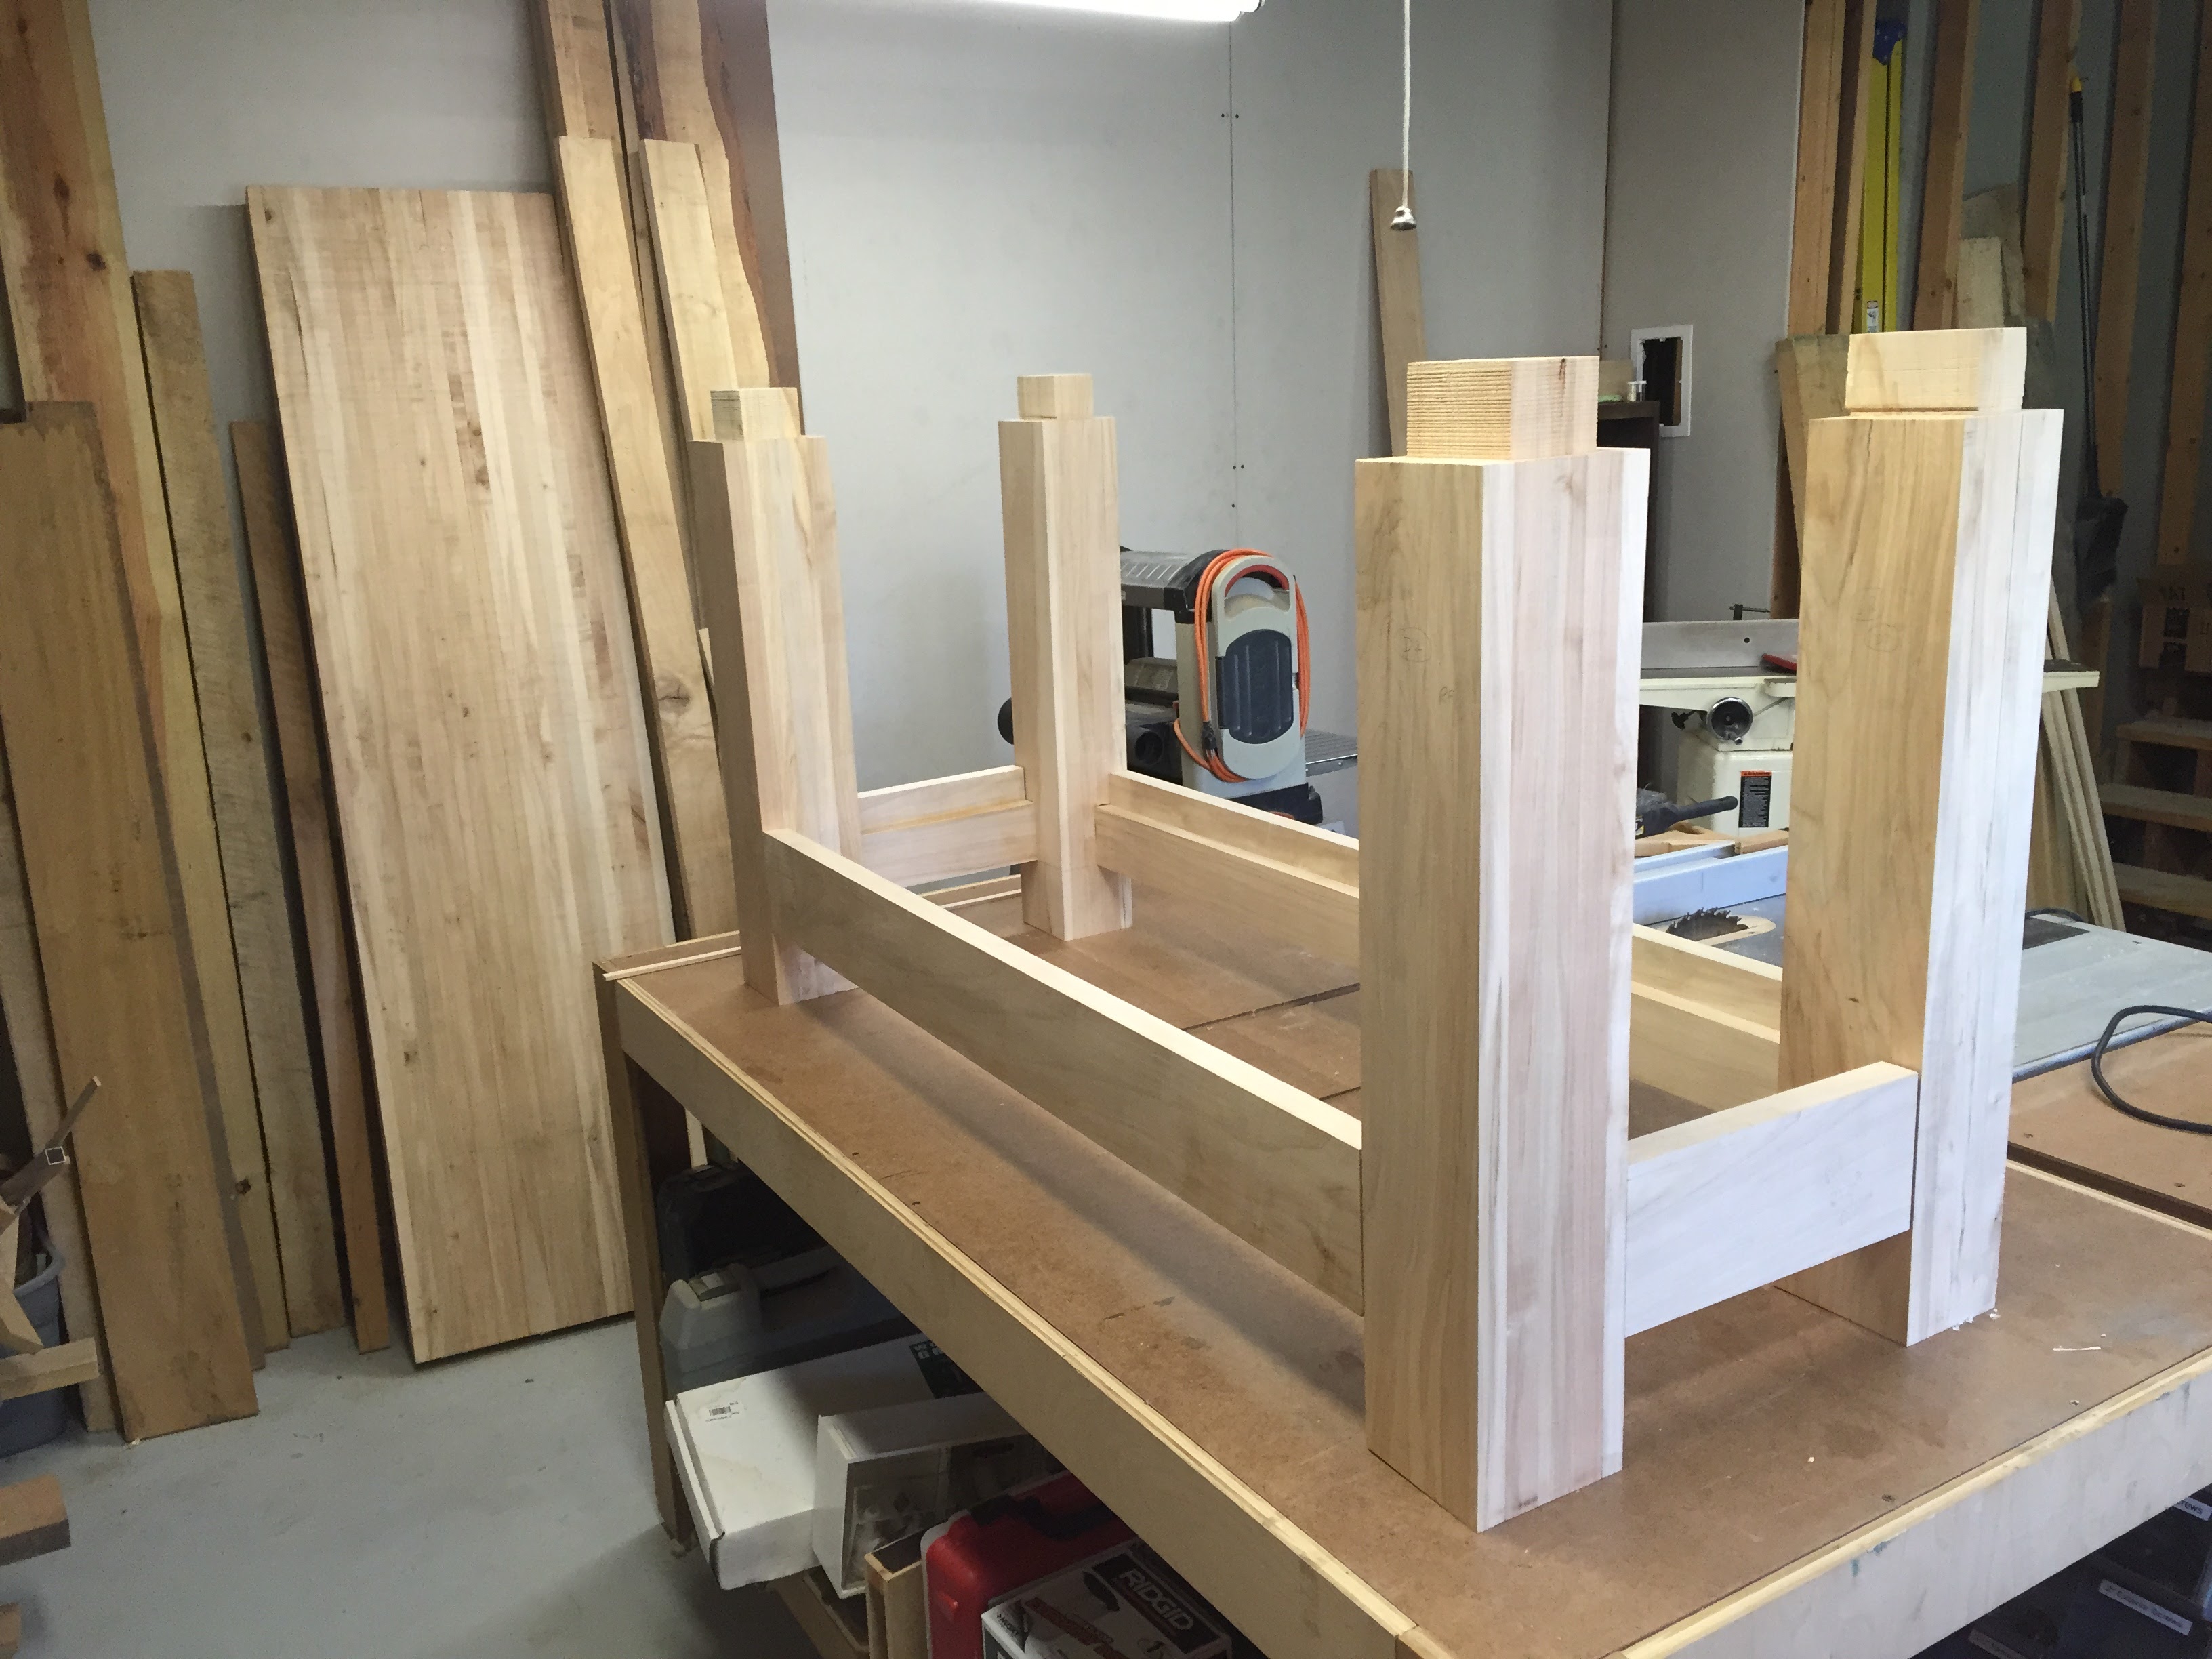 After a great pile of drilling, followed by a whole passle of chisel-poundin', I've managed to fit all eight stretcher tenons to mortises in the workbench legs. This is the quickest work on this project yet. The boys are 9 and 4 1/2 now, so I'm finally able to grab a half an hour here and there to sneak down to the basement and get some work done. (As long as I balance it with other fatherly duties.)
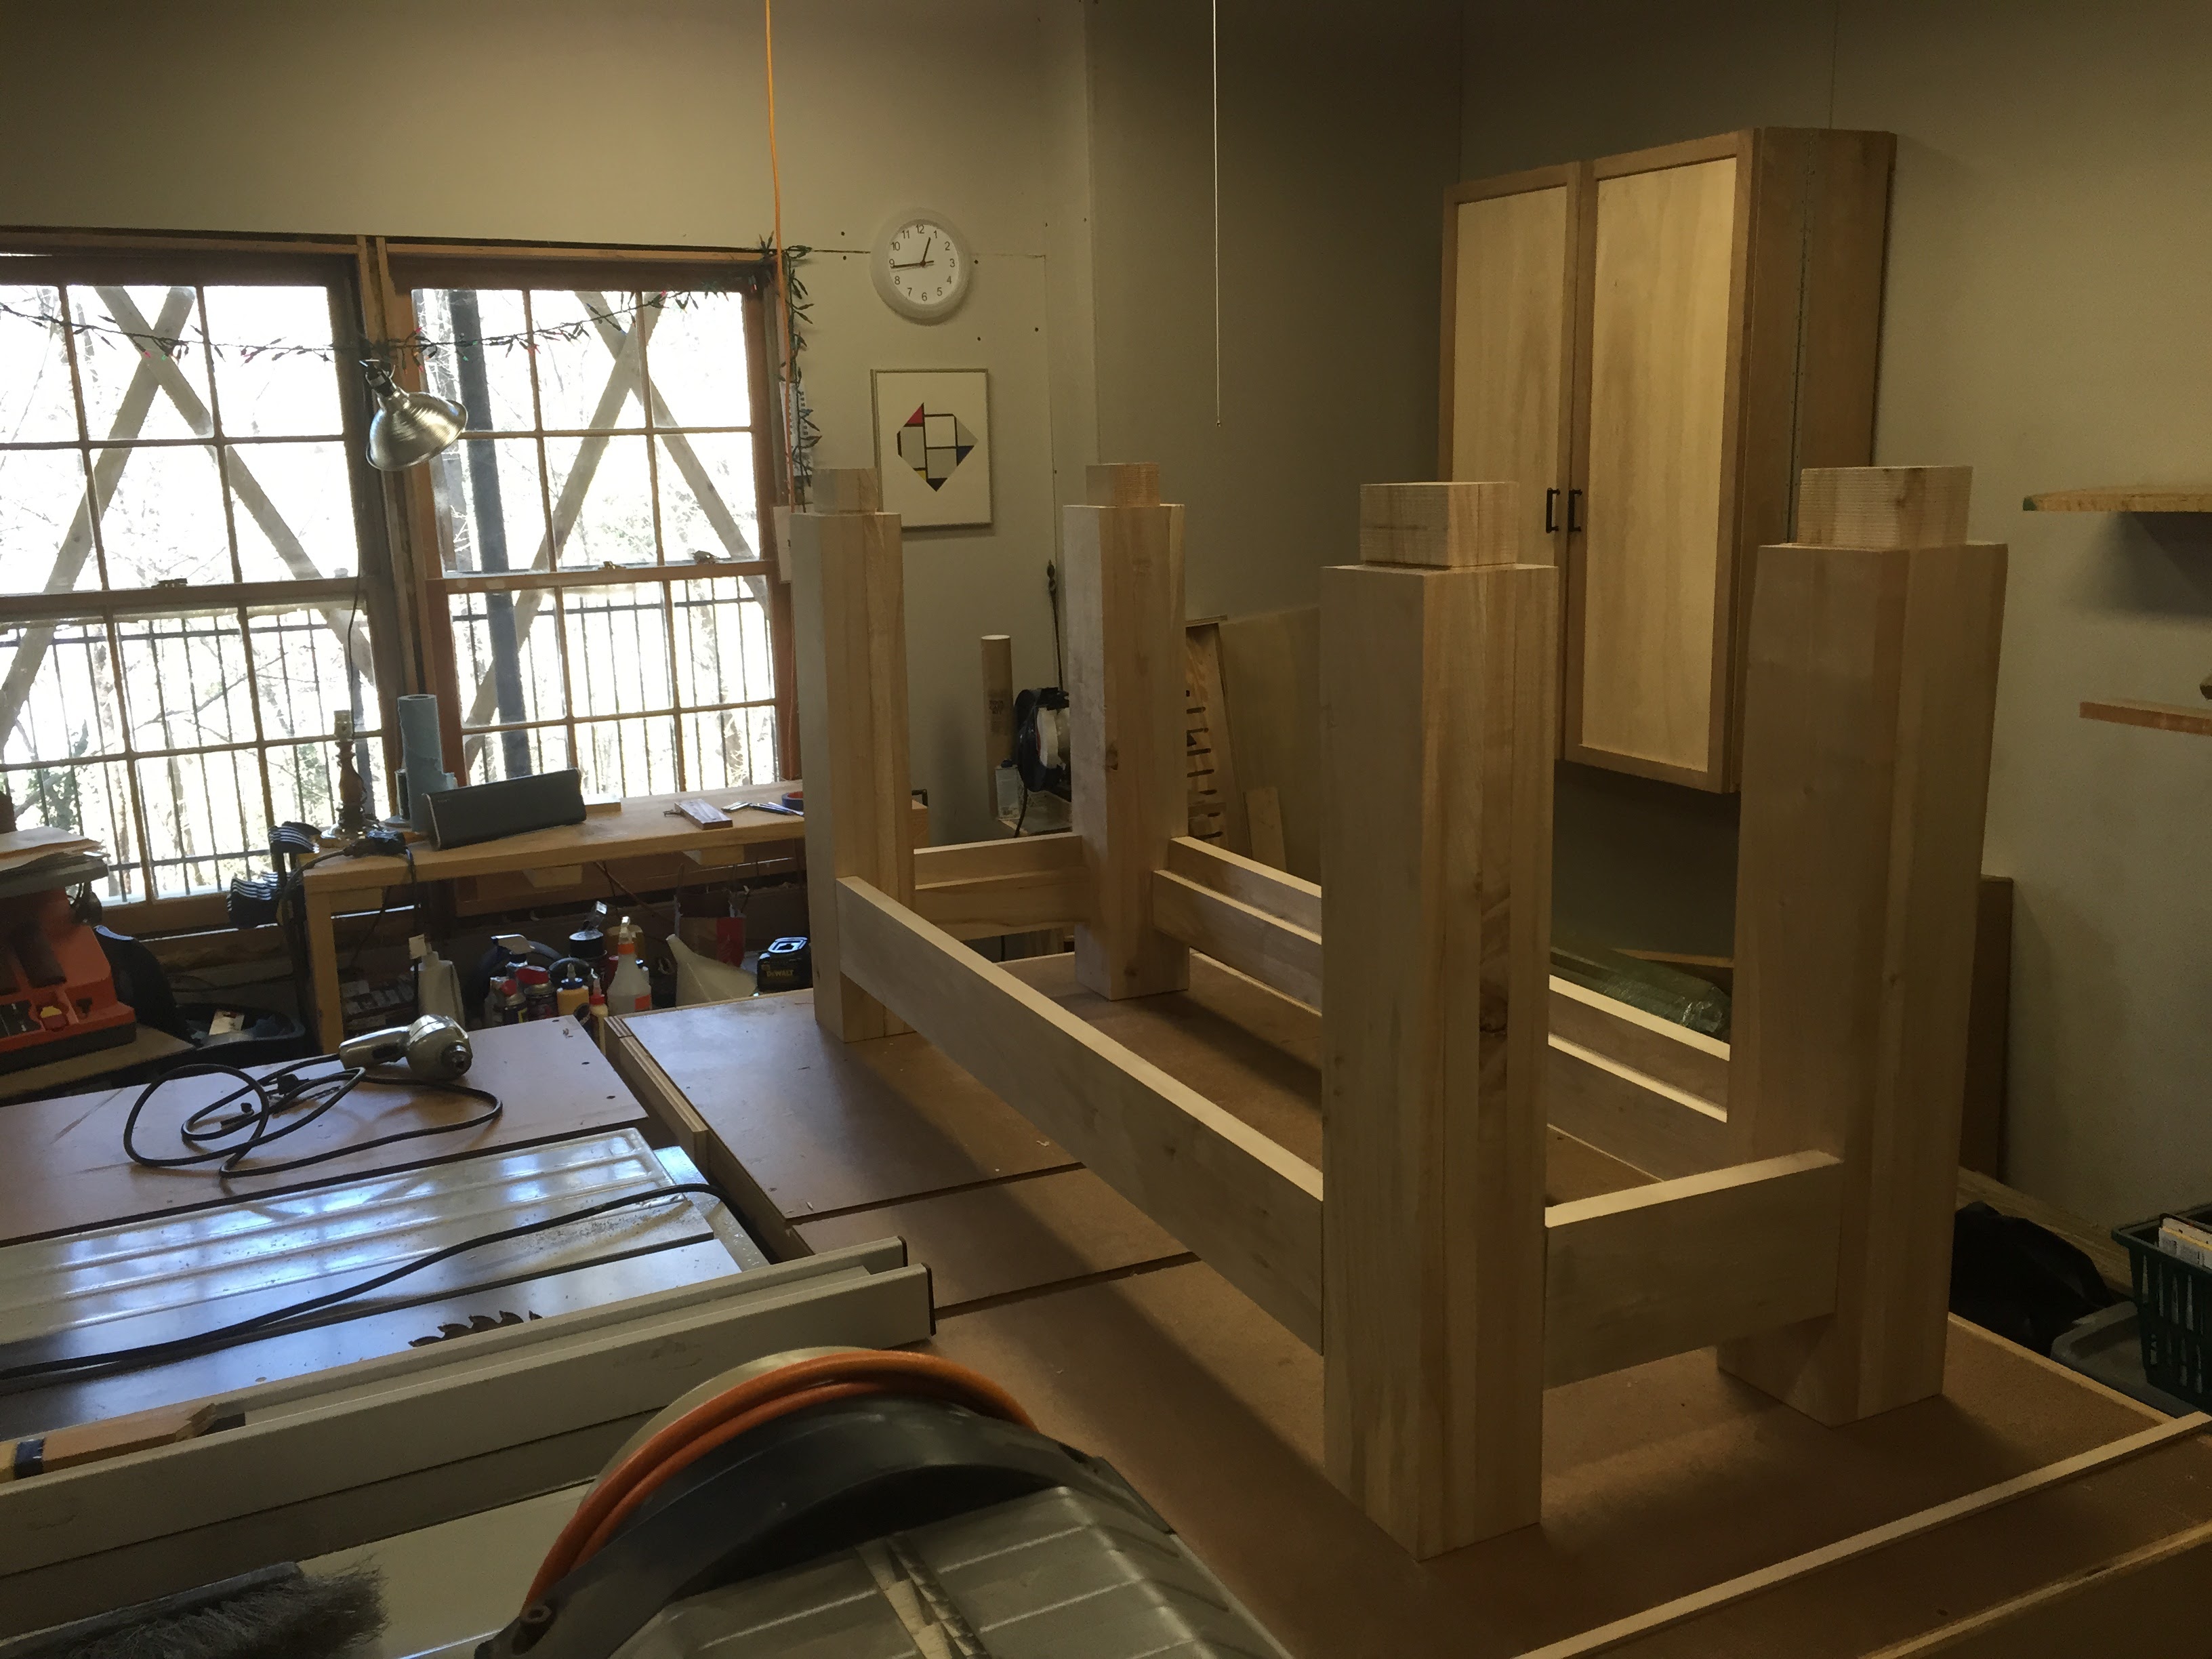 Next up, I set aside one four inch wide strip of silver maple to serve as the front edge of the workbench top. I had originally intended to carve a message into it, but the more I think of it, the more I want that edge smooth and unblemished for better work-holding. I think I may, though, carve the message into the front of the leg vice. I'll have to see what looks right. I think I'll still stick with my original message, from 'Two Tramps in Mud Time' by Robert Frost