January 2020 - Bringing the Project back to Life

  • Posted on: 30 January 2020
  • By: Jay Oyster

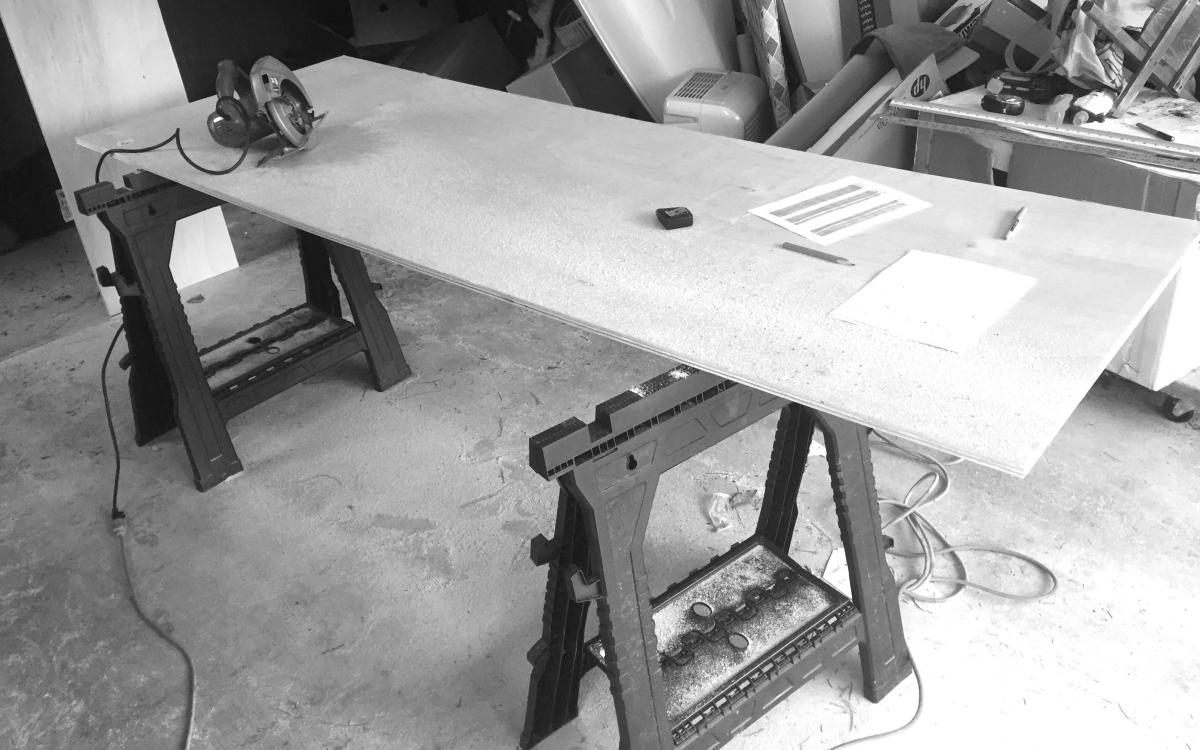
OK, after moving four times in six years, I had two projects that I'd dragged along all across those moves . . . my workbench, and my wife's jewelry cabinet. Both projects were approaching 10 years from start, and I was both embarrassed and tired of not having them done. So last year (2019) I finally finshed the workbench. And in January 2020, after doing a bit of a reorg in my shop, I was finally ready to make the final push to complete the Jewelry cabinet.

Using the newly finished workbench to build the side doors of the jewelry cabinetI didn't even know for sure if I had managed to keep all of the pieces to build the rest of it. So the first thing I did was to assess the project and find the cut parts in amongst the piles of wood that I moved between the various houses. I did find all of the pieces, especially for the side and front doors. But it was a bit of a jigsaw. The side doors, particulalry, had several large pieces of fairly thin quarter-sawn  sycamore that I need to glue together into panels. And I knew that I couldn't get two faces that were clean, meaning two faces of white sapwood. So a big part of the next step was deciding on an approach to glue up and size the panels for the side doors. 

After reclaiming the shop, I needed to assess where I left the jewelry cabinet project

Final week of work to finish mudroom bench

  • Posted on: 10 November 2018
  • By: Jay Oyster

Finishing up the paint. Benchseat not yet installed.September 2018 - I got some help to move the case up from my basement shop to the garage. Thank you very much Kamil. Once it was in place there, I worked on getting the crown molding installed, as well as the lighting. Once those were in place, I took a couple of weeks to paint the whole piece with General Finishes "Charleton Blue" chalk paint. It took two coats with a quick sanding after the first. 

Finished bench, seat installed, lighting working, hardware installed.October 13, 2018 - This is the weekend I finished this project. Sprayed the whole case with lacquer. (I don't have a HVLP spray rig, so it was rattle cans from the  big box store. $12 a pop for those cans, but the result was worth it. ) 

Then it was the struggle of getting the 2 1/2" thick cherry seat installed. Boy, that was a challenge. It had fit perfectly in the shop, but of course, after the paint was applied to the case, and of course the higher humidity of the garage space where it's installed, it didn't quite fit. I had to haul the seat back to the shop and sand and plane a bit more to get the clearance needed to make it fit. It's a very tight fit, specifically in the center where the seat fits tightly around the center vertical shelf piece.  

Cutting Plywood and Poplar

  • Posted on: 4 February 2018
  • By: Jay Oyster

Wall where the mudroom bench will be installed. I have a power outlet to move.Mudroom Bench Project — For everything but the solid wood benchtop, this was a project to be supplied quickly and conveniently at the big box store. I did spend more time than normal looking through the plywood and poplar choices to make as clean a selection as I could given their generally lower standards. But I ended up bringing home three sheets of 3/4" birch ply, 1 sheet of 3/4" 'Sandply', 3 sheets of 1/4" birch ply for the backs, and numerous pieces of 1x6 poplar for the face frames and crown molding. My helpers - Liam, Elle, and Remington I also thought about whether or not I wanted to route the bead board backing of the seat area, and ended up by pre-formed and primed whitewood  bead boards. That should save me some time.  I also bought some sacraficial plastic sawhorses. 

I brought it all home and stored it in the garage for a day. I checked out the physical location of the bench and realized that I have a power outlet to move. (And clearly some Halloween decorations to move . . . oh, and my old Kaypro II computer, purchased in 1983.) As I was working, Liam and his friend from the neighborhood Elly showed up with her dog Remington. I enlisted Liam to help out. 

Breaking down the sheetgoods in the garageThen I set up my saw horses and my cut list, and carefully cut down the 4x8 sheets into the approximate widths I needed for all of the larger pieces. After cutting them down, I carried down into the basement shop through the door  on the other side of the house; the one place where the basement isn't below grade.  For the smaller pieces, I had Liam carry them. He's 11 . . .old enough to start earning his keep.

Breaking down the sheetgoods in the garage

Mudroom Bench

Finished it in early October. Quickly used to capacity.
We don't have much closet space on the first floor of our home, so we need a mudroom bench to store coats, boots, hats and gloves.

Photo from FinishesbyAlan.comWe have a spot at the front of our two-car garage that will serve as the home for our mudroom bench. The previous homeowner had installed a half deck a the front of the garage, with a small workbench and space for storage. The area near the door into our kitchen seemed suitable for a bench, so I designed it to fit there.  'Designed' may be too kind a word, however. i took my inspiration from a photo I found on Houzz. I liked the layout of the shelves and the boot nooks under the bench of this design, so I designed around that layout, and adjusted it based on the available space. 

The other design consideration was what to build the bench from. I couldn't make this truly a 'fine furniture' piece, because it will be sitting in our unheated garage, and subject to the knocks and dings of our two young sons and their friends. Still, I wanted it to be sturdy, and at least attractive. So it's built to be like a factory pieces, with screwed construction and plywood for most elements, but it will have solid wood face frames and crown molding. I thought briefly about running over to Peach State Lumber to buy some furniture-grade plywood, but time-constraints prevented that. I bought birch plywood and one sheet of 'SandyPly' from the local Home Depot for most elements, and some pre surfaced poplar for the face frames and top parts.  My wife picked out the color she wanted. Originally, she liked all white, but I think we're both rebeling a bit against the current design trends of neutral colors against a bright white background, with dark wood and stainless steel accents. Too sterile feeling these days. She picked a color based on a sample I bought . . .  General Finshes' Charleton Blue chalk paint.  I'll put a coat of clear varnish or ply on top to provide protection.  . . . I'll figure that out at the end.

StartDate: 
Saturday, January 20, 2018 to Saturday, October 13, 2018
Finished project?: 
Yes

Fitting the Piece to the Place

  • Posted on: 3 February 2018
  • By: Jay Oyster

The area in the garage where the bench will go, top of the stairs, to the left of the door, up on the deck.The mudbench is going into the front corner of our garage. As I described on the project page, our garage has a raised deck at the front where the previous owner built a small workbench, and then some storage space where we've got some shelves. The area near the side door into the kitchen was previous just a catch-all space where the kids threw their backpacks and jackets and such. We still want to use it for that, but we want to be able to have some organization, and so I won't be tripping over their shit all the time.

I mocked up the basic space with correct dimension in Sketchup. (See at right)  The model doesn't include the railing along the near edge of the deck, and up the left side of the stairs.  The workbench is just a 2x4 and plywood structure that I've represented by an accurately sized rectangle in the middle of the deck. 

Bench design in the intended location. This was my prototype test to see how it would look in place.

So I took the bench design I worked on over the holidays and placed it in the model to see how it looked spatially, and as a design. To my eye and my wife's eye, it looks good there. She particularly likes the color.

Garage deck with bench in place, deck railing removed for clarity

Stairs for the Backyard Deck

We need to replace our deck. I would have waited to replace the stairs, except the others just plum fell apart. So, I had to build some stairs.

My first set of stairs. Wider than the older set, and less prone to falling down under their own weight, at least for the first 10 years. :-) I'm backfilling this story. I did the work, with Liam's help, back over the Thanksgiving weekend. A fun project in the sun just before we began the coldest snowiest winter in Georgia history. (At least to my memory.)

StartDate: 
Saturday, November 25, 2017 to Monday, November 27, 2017
Finished project?: 
No

Frame for Liam's Abstract Art

Finished framing of Liam's small abstract oil on wood
Our son Liam created a little oil on wood abstract piece. I liked it enough to make a frame for it.

All items on hand, including the shadowbox back, which was painted with a can of charcoal grey I had on hand, along with some nice clear cherry left over from another project. After painting the back, I liked the look of the natural cherry against the painted backdrop, so I left it that way. It really makes the painting pop, I think. I'm very proud of Liam's artistic skill, especially his amazingly mature use of color.

StartDate: 
Thursday, October 12, 2017 to Saturday, October 14, 2017
Finished project?: 
Yes

Crochet Blocking Board

Completed crochet blocking board
My sister asked me if I could try making a 'Crochet Blocking Board'. This is a tool for flattening and straightening squares of crochet-work. It's comprised of a flat board with a grid or array of holes drilled in it accompanied by a set of dowel pins that are used to stretch the crocheted piece while wet. 

There are a ton of examples of such blocking boards for sale on Etsy. My sister pointed me to a couple of them, but this was the example she sent. She thought they were a little expensive, especially for the size, and was hoping I'd make her a little bigger one. I, of course, went overboard and initially designed and laid out a 24" square board, but . . . 

  1. It was too big for her to work with
  2. She had flown down from Ohio to Georgia to attend DragonCon, and I was planning to give it to her then, But there was no way she could fit a 2' square board anywhere in her luggage.

So I cut it down to 18" square, which . . THANK GOD!   Because if I had gone ahead with my plan for a 1/2" on center grid of holes at 24" square, I'd still be drilling holes a month later.

As it was, I did go with the half-inch on center hole grid. I gave myself an inch and a half border, but that still resulted in a 31 x 31 grid.   Yes, I drilled 961 holes.   Those Etsy blocking board don't seem that overly expensive to me anymore. 

StartDate: 
Saturday, September 9, 2017 to Tuesday, October 3, 2017
Finished project?: 
Yes

Pages